Built by Peter Jones and Mike Jones, Barrie, Ontario (picked
up kit on March 11, 2006, started work in June 2006, roller on Sep 30, 2006, gokart on Sept 2, 2007, body work started in March 2008
and painted in Nov 2008 and again in Nov 2009. Licensed and legal in Mar 2008. On the road in Aug 2010, with
1500km before putting it away for the winter. This web site summarizes the build of our Factory Five
Daytona Coupe. The kit was picked up in
Wareham, MA (near Boston) on March 11, 2006. Our build is intended as a daily driver
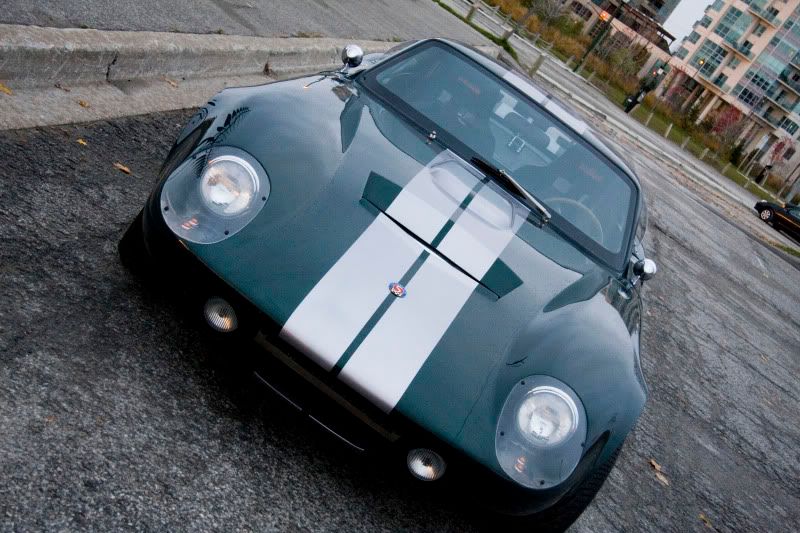
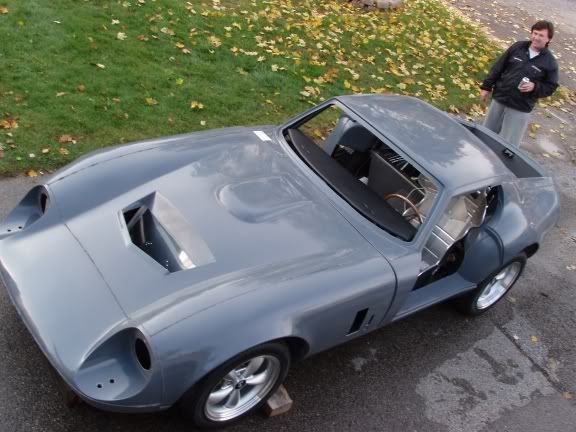
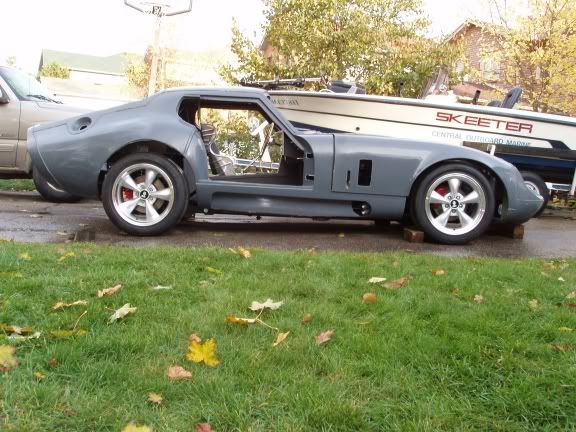
with lots of performance. updated Nov 2009Our Factory Five 1965 Daytona Coupe


Donor parts used included:
Everything else was new.
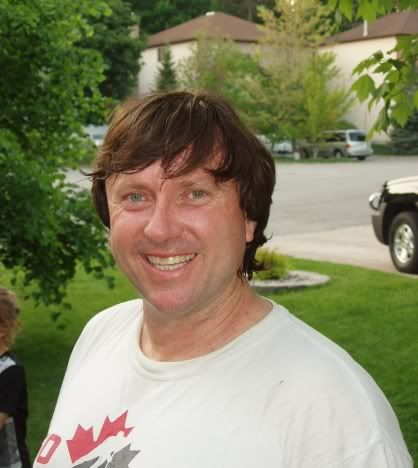
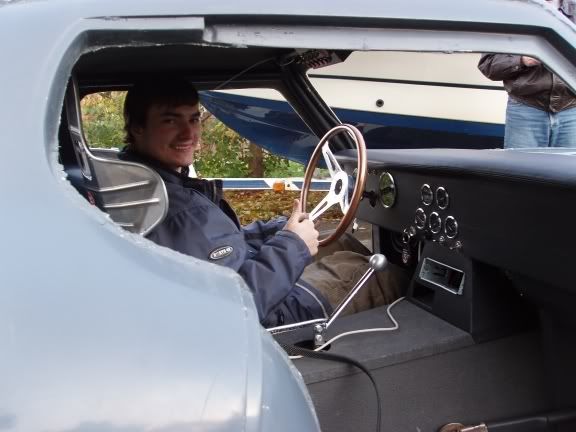
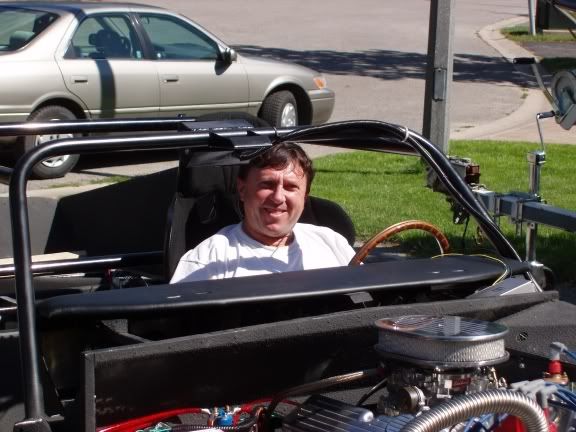
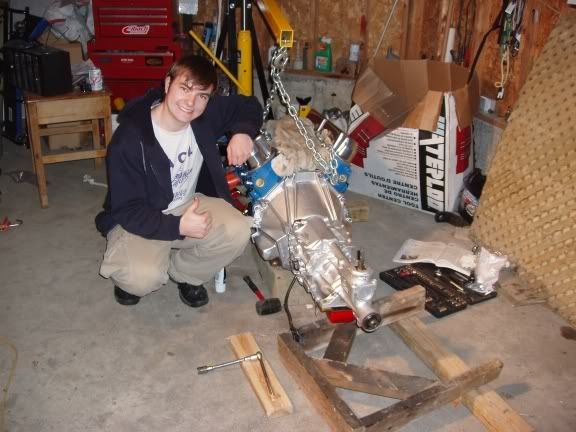
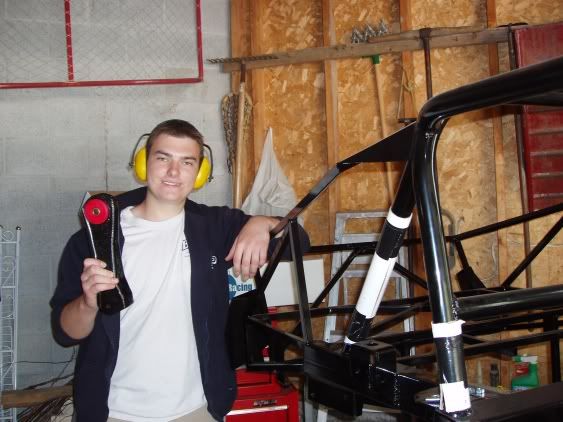
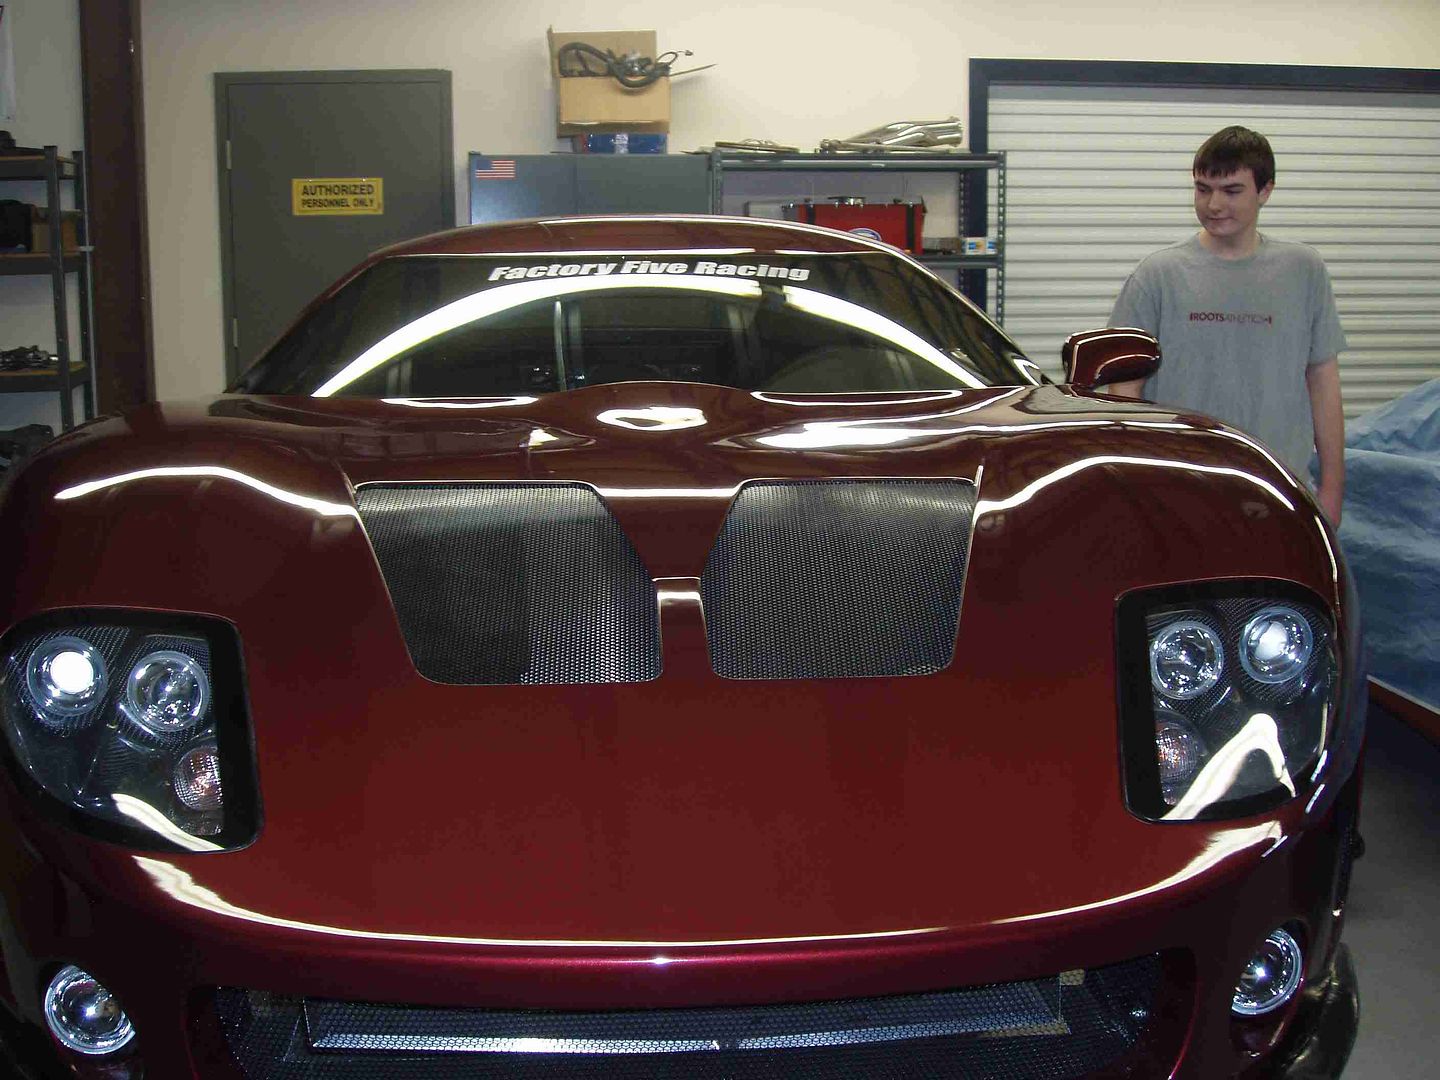
This is Peter Jones immediately after we got the kit stowed in the garage - the build was initially his idea.
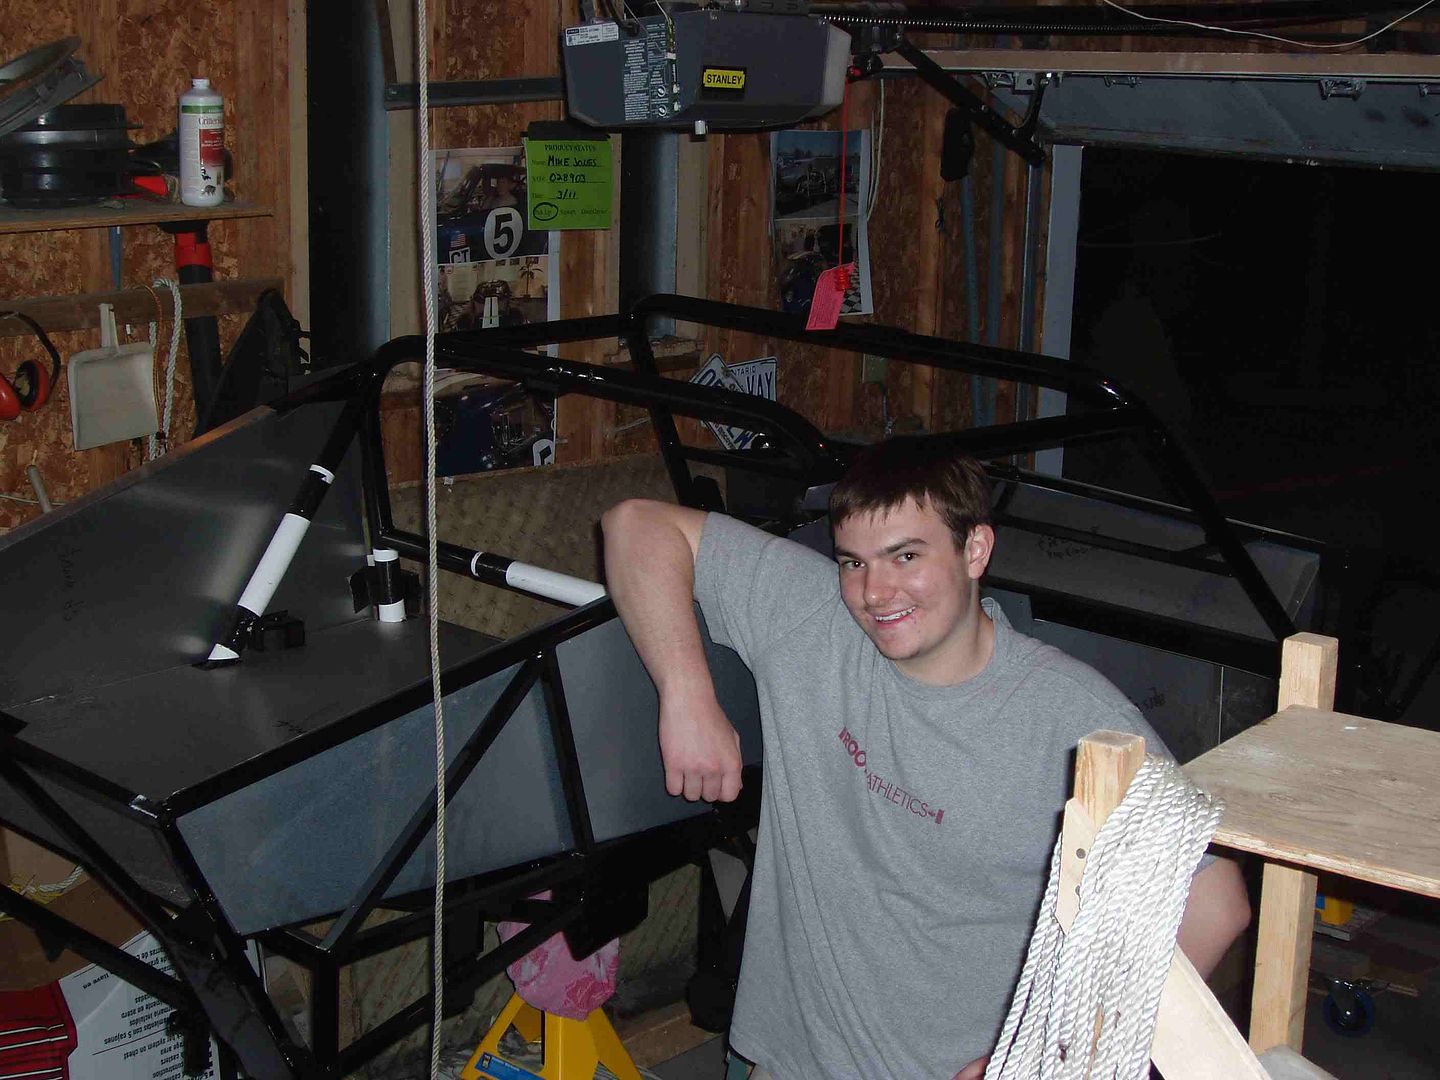
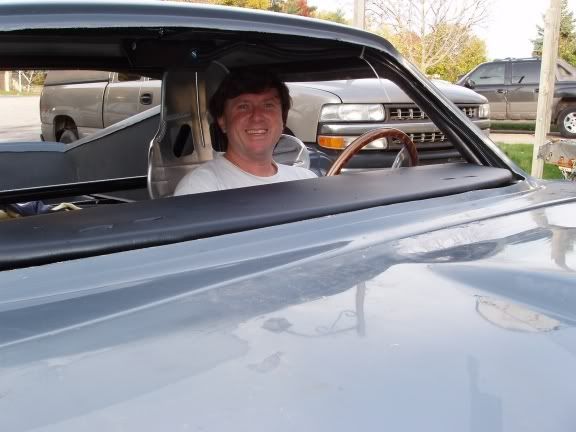
This is Mike Jones. I look after details, parts sourcing and paying.
Car Specs
| Chassis: FFR standard | Wheelbase: 93" |
| Rear: Ford 8.8 3.05:1 (also have 3.55's and 3.75's for later mods) | |
| Brakes: Front - 11" ss rotors with single piston Mustang calipers | Rear - 5-lug conversion, 9" ss rotors with single piston Mustang calipers |
| Wheels: Cobra Bullitt fronts: 17x9 +24mm + 5.95"BS, rears: 17x10.5 +27mm + 6.9" BS | tires: Vredestein Ultrac Sessanta 275/40 ZR17 fronts, 315/35 ZR17 rears |
| Front suspension: FFR tubular UCA, Mustang LCA | Rear suspension: 3-link with modified brace |
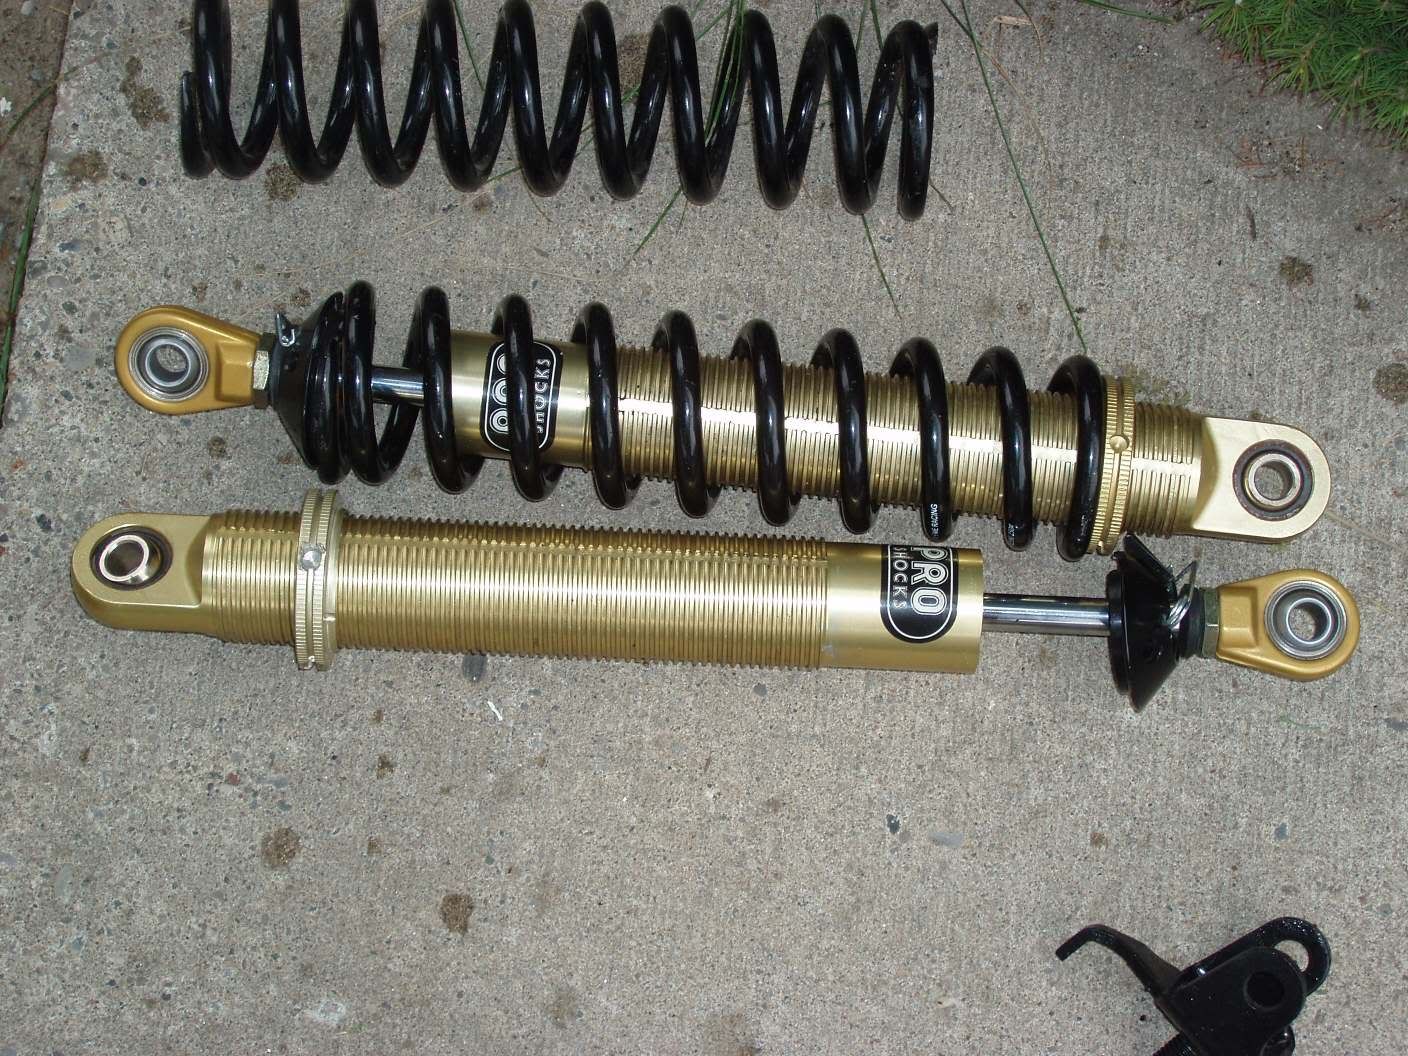
| Springs: Front - Proshock coilovers with 650lb springs, | Rear - Proshock coilovers with 350lb springs |
| engine: Ford 302, bored 30 over, lots of mods by Campsall Engines, | Intake: Typhoon Crosswind |
| Crank: Ford original | Induction: Edelbrock 1406 650cfm |
| Ignition: MSD 6A with MSD billet distributor, | |
| Weiand billet water pump | Clutch: Magnum Dual Force |
| radiator: Griffin | alternator: GM one wire |
| transmission: rebuilt Ford T5 | |
| planned paint: dark green (almost black) with cream stripes | FFmetal extended pass footbox |
| air conditioning: Vintage Air from FFR | steering: Mustang de-powered rack and pinion. |
| Gauges: Autometer | wiring: I-squared Million+ system |
| seats: Kirkey racing | leather dash & carpet interior |
The following photos are in reverse chronological order (sort of) and show the progress of our build over time. You can click on the photos to look at the larger images or you can go to www.photobucket.com and search on my user name of mikejones3332001 , if you prefer to look at the photos directly. There are lots of additional photos there, too.
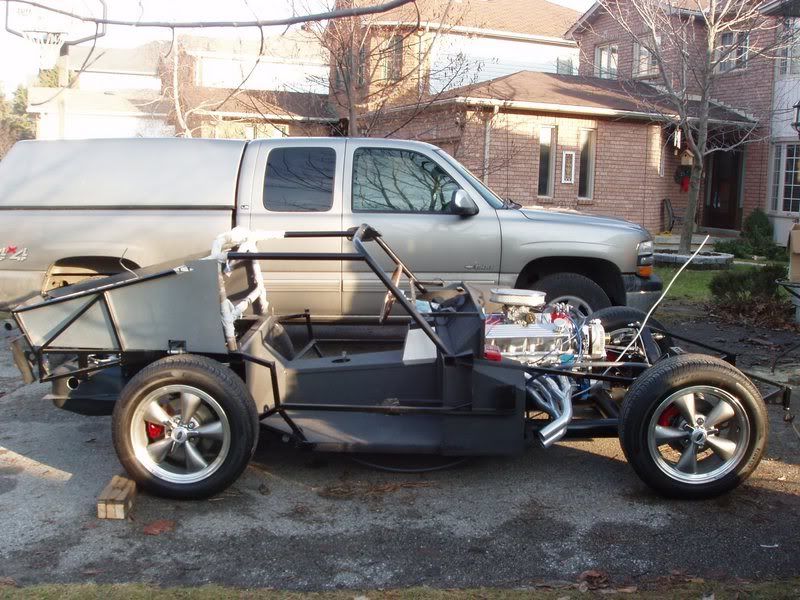
November 2010 - What a fun fall! Have about 1500km on the car, with no major breakdowns, no tow trucks, nothing falling off, etc. The bolts in the transmission mount broke, so replaced the mount. Maybe not torqued correctly, or bad parts, only time will tell. The car goes like a bat out of hell, with very fast acceleration between 30 and 100. Fifth gear starts at 120km at 1800rpm so it is not particularly functional with the 3.05 rear. I'll switch to 3.27's or 3.55's at some point, which will provide quicker acceleration and a more usable top end.


August 2010 - We are in final assembly mode, putting everything back together for the last time (hopefully). The body has been put back on and each piece is torqued. Initial alignment has been set for -1* camber and -3* caster with total toe-in of 1/16". Alignment was done using a Fastrax tool, which worked quite well. Our intentions are to drive it over the fall, and work out the kinks. After that, the interior will be completed (carpet and interior trim, etc.)
There are a few things that I already know will be replaced but it is a matter of when. These include:
| head liner - I used the FFR liner, and I dont' think it is the right colour. I also put in a couple of creases that bug me. |
| wiring - there are a few things to tidy up |
| buff and polish - maybe just one more time |
| get rid of the donor parts - one at time as they wear out |
| improve suspension and handling - bumpsteer, Ackerman mod, SAI mod, etc - run some autocross first to see what needs work |
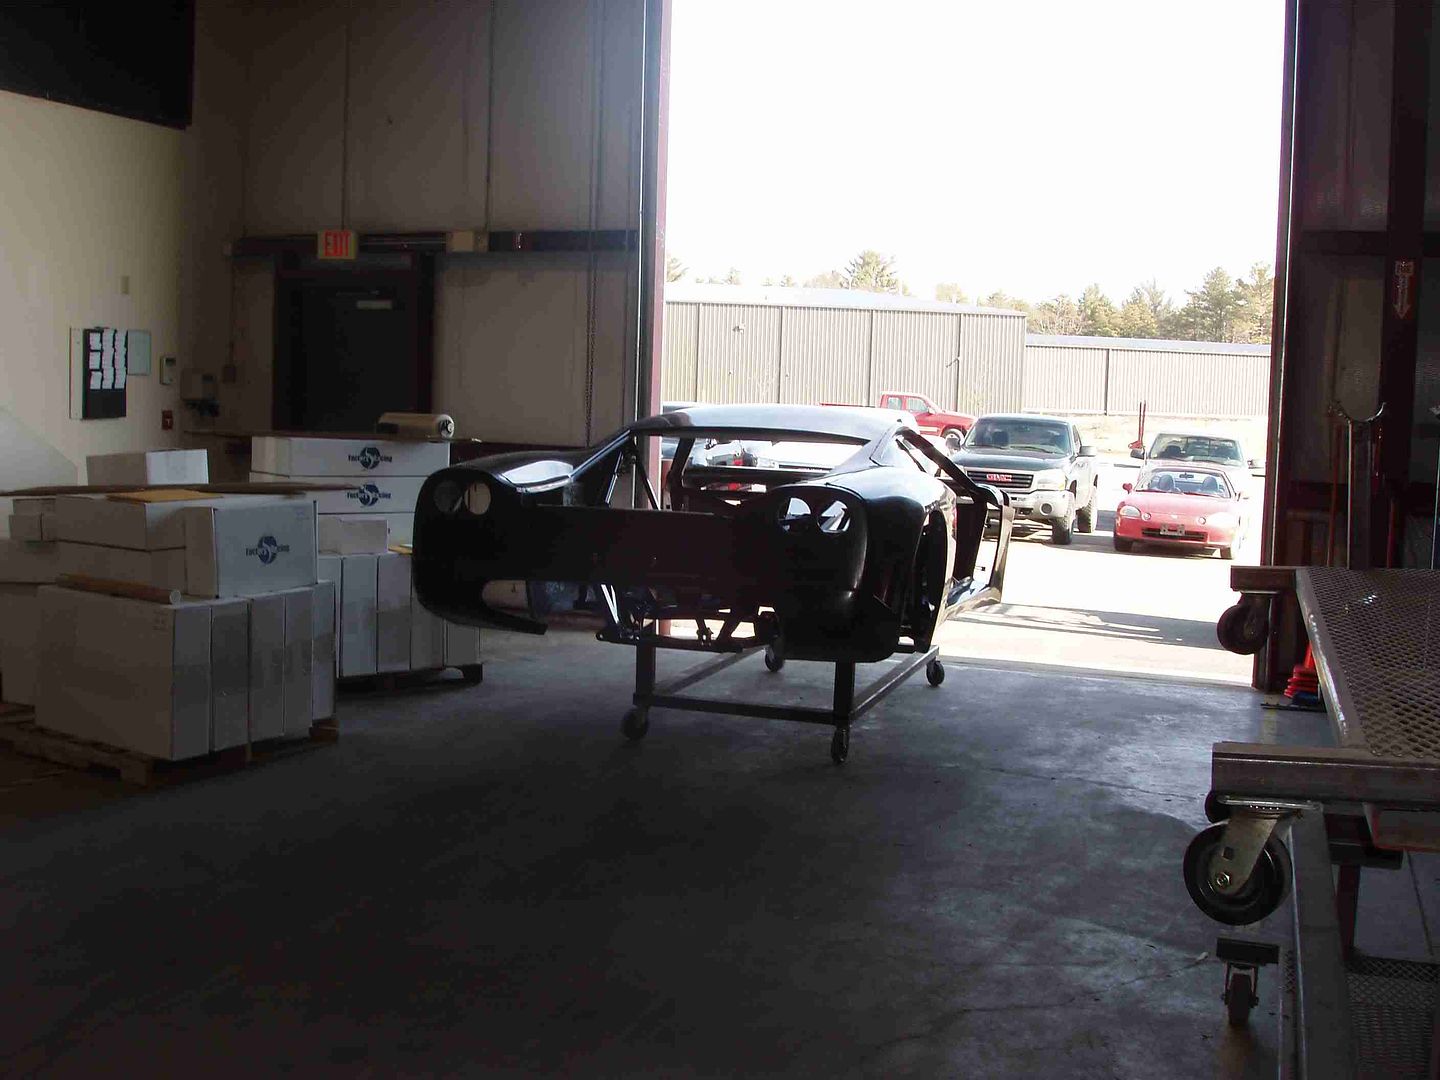
Summer 2010 - Main Component Assembly
Spring 2010 - Final Paint Work - We are finishing up the final details. There is a light at the end of the tunnel. First step was to clean up the paint job. Although much better than the last time, there are numerous issues, but nothing that time and patience won't fix. I am worried that the repairs will eventually show but we'll deal with that when/if it occurs. I had two problems with the clear - blowing chunks (partially congealed bits still in the gun when the next coat was shot) and water or dust haloes. The first really wasn't hard to remedy by treating them the same as a run - shave with a nib file, wet sand 1000, then 2000, then buff. Haloes or fisheyes are a real pain in the butt. I washed the spots with a spirit cleaner, then daubed a small amount of fresh clear into the hole to raise it, then nib file, sand and buff. Not bad if you only have a few spots but I had a couple of locations that had chicken pox. It looks good at the end, and is only coarsely buffed. Final two buffing steps will be done after putting on the body because I expect a few scratches.


November 2009 - What a difference a year makes. Last year's paint had a few issues - the biggest was that there were a few areas where the colour was thin with primer showing through. There were also a couple of drip marks where I splashed water onto the body. Once it is covered in clear, thre is nothing that can be done about it. As well, the clear had craters in a few locations, and was applied too dry in a few locations too. It doesnt pay to rush, as it probably took about 200 hours to get back to where I should have been.
So,I decided to sand the entire car and re-paint. I started with 600 wet/dry and then quickly changed to 600 dry using the DA. After hardening over the winter, the clear is bulletproof. I re-built the paint booth in the garage but omitted the plastic on the ground. Instead, I hosed down the floor, then brought the body pieces into the garage. The stripes were then taped off and painted, then covered the stripes and painted the body color. Seven coats of each color were applied. Then a dust coat of clear was applied, followed by three heavier coats.


The clear had a few issues with craters, particularly on the doors. I had shot the doors and spoiler last, so maybe had problems with water in the lines. I filled the craters with dabs of clear, shaved them flat with a straight razor, wet sanded with 1500, re-shot color on the two edges I burned through, then shot clear again.


Summer 2009 - It took a while to get motivated while I was tring to decide what to do with the paint. However, a bunch of "smaller" things like the plumbing for the air conditioning and electrical connections for the lights, stereo, heater, horn, etc were completed. I used weatherproof quick-connects throughout.


November 2008 - Finally, paint. I didn't think that we would get to see color this year because the temperature wasn't cooperating. It best to have temps over 15° (60°F) although apparently you can still work down to 10° (50°F). I got the car primed and blocked flat, then the temp dropped to 0° and it snowed. Nov 3 to 6 was forecast to be 18-19° so I put up the plastic room, and painted the three coats of sealer on Nov 3, three coats of stripe color on Nov 4, laid out the stripes and body color on Nov 5, and cleared on Nov 6. I finished at 3am and left for Thunder Bay for work at 4:30am. All in all, I'm pretty happy with it. Not bad for $500 in supplies, but it is definitely a huge amount of work. With practice, more time, and better temperatures, it could even be fun.
The paintbooth is made out of cheap "dropcloth" plastic (8'x120') and included plastic sheeting on the floor. I added an 800cfm duct fan blowing in and a 200cfm fan blowing out. Furnace filters were placed on the inlet and the outlet. I also set up a 80,000 BTU tiger torch just outside the room and underneath the fan blowing in.


The sealer and color used is water-based from autoaircolors.com and used PPG Omni Clear. The sealer is:
THe water-based color goes down very easily. It is applied as a dust coat and covers thoroughly with little paint. The clear was a little tougher, and I probably didn't put it down nearly thick enough. I did one light coat and a couple of heavier ones. I would definitely use the water-based again based on its application. Spraying is very easy for a newbie because it is easy to dust it on lightly. There are a myriad of colors, that can be mixed to make anything you choose. Metallics and
sealer and the silver stripe


tape and body green


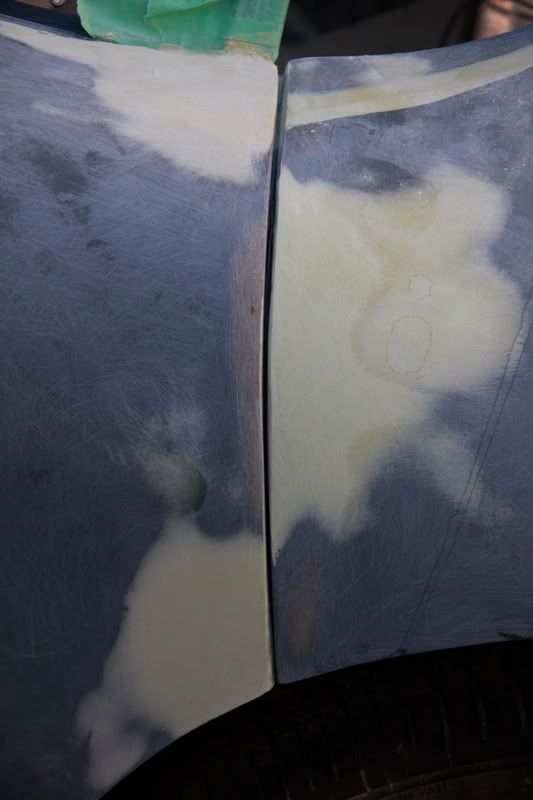
Unfortunately, I have a few problems but none are insurmountable, but will require a bit of work. THere are two areas (about 6"x12" each where the body color did go down deep enough and I can see sealer coat. I also have two spots where I splashed the color with water that I was using to wet the floor. The clear was not put down thick enough so I have a couple of rough spots and a bit of orange peel. This is worse along the side of the stripes on the hood because I realize the gun has an internal filterand it rapidly clogs with the fleck that is in the stripe color, causing me to dryspray until I ripped out the filter. There are also a few pocks in the clear that I hope will sand out or I can fill with clear. I plan to wetsand the entire clear, dust in additional color to cover the flaws, and re-apply a couple of new layers, then wetsand again, cut and buff. As a test, the image on the left had some orange peel so I wetsanded it to 1000 and quickly buffed with cutting compound - there are swirl marks but it will shine up quite well.


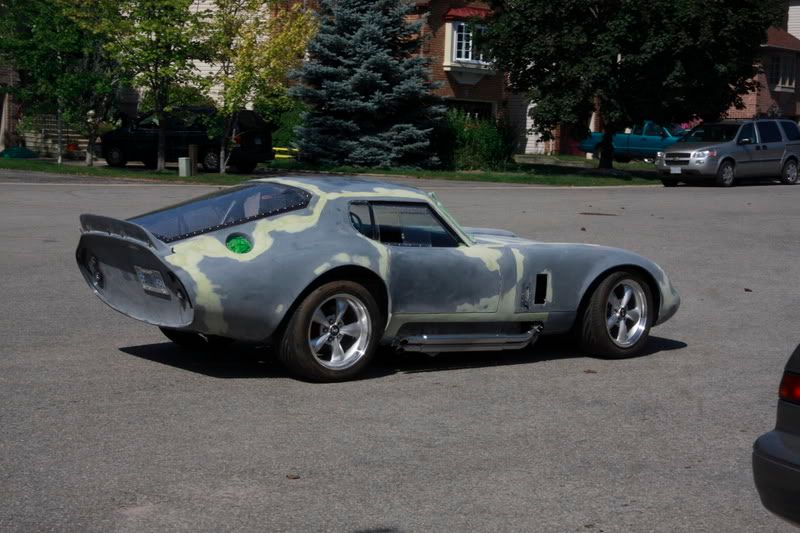
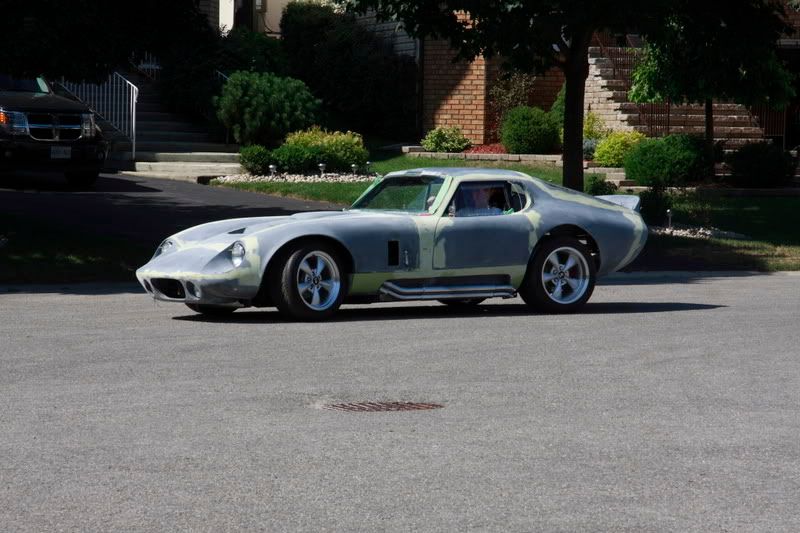
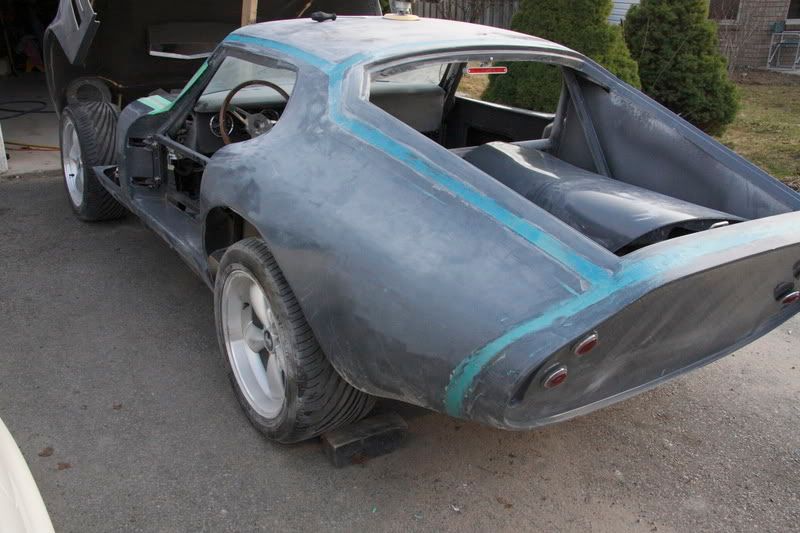
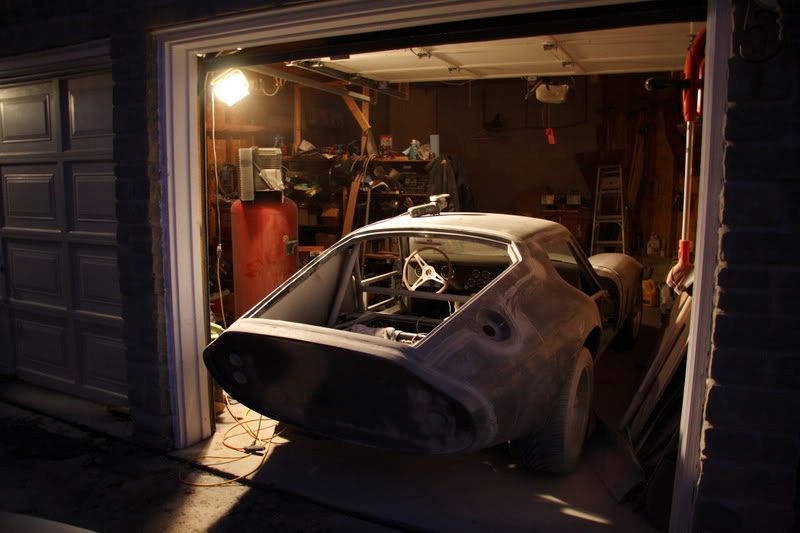
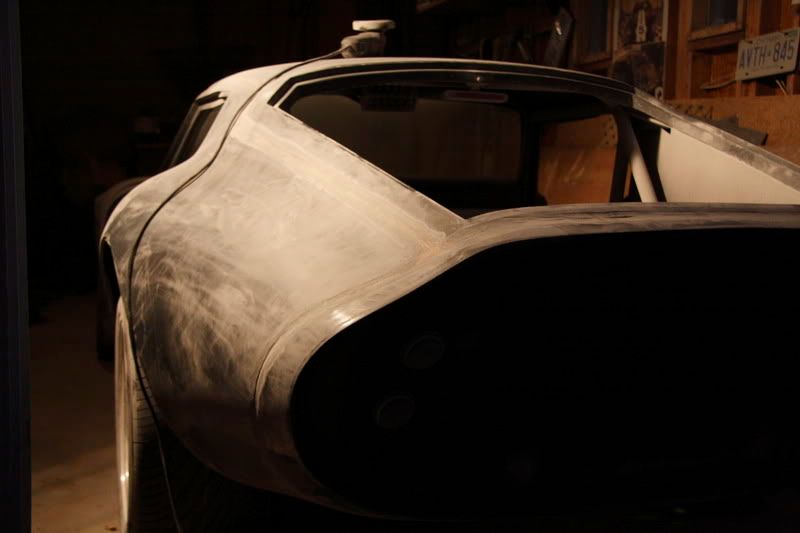
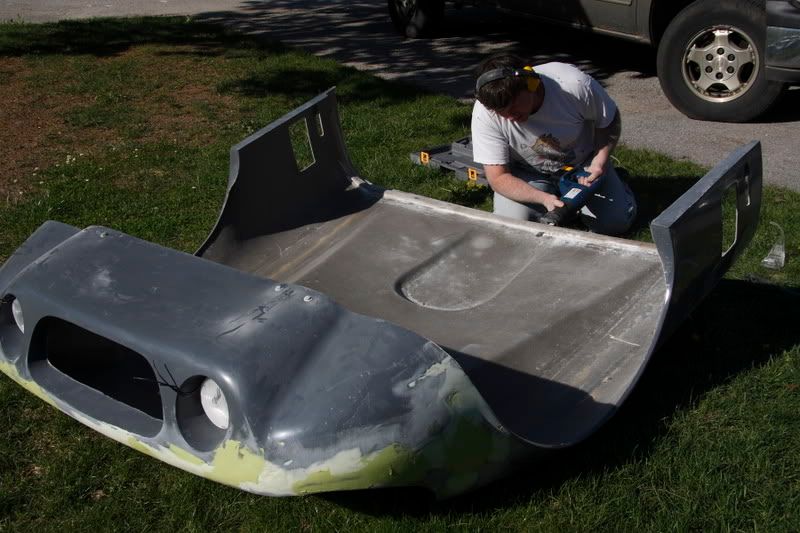
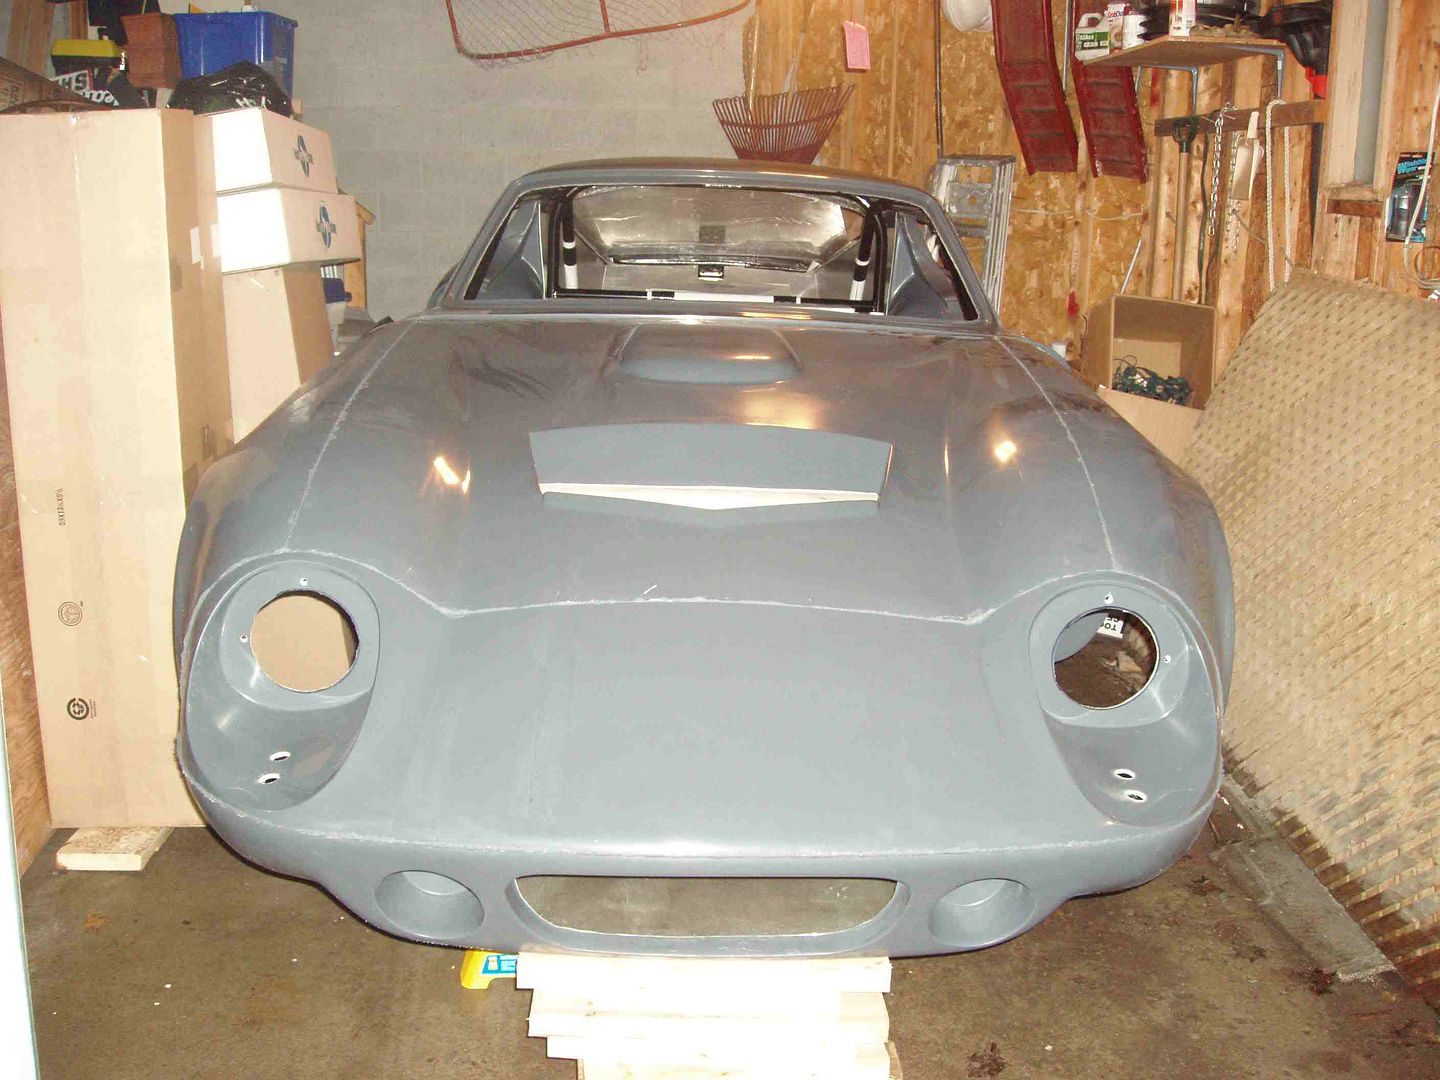
October 2008 - All of our efforts have been on the body work and getting ready for paint. We're now down to step 10 and there is a light at the end of the tunnel. I no longer have fingerprints and will be happy to never sand anything again. Sprayed the second coat of FF G2 on the body on Oct 19-08, and am still amazed to find areas that need more blocking. I have used two gallons of FF G2 and sanded off much of it. We applied two coats (first light and second wetter), allow to fully set for a few days and then block and fix blemishes. Then a third coat is applied to cover followed by more blocking. I am using Evercoat metal glaze (catalysed) to fill pinholes and small imperfections in the FF G2.
The body is generally in good shape, but needs lots of finessing to close the gaps and line up the panels to match. Not knowing body work, I did a lot of things twice, applied too much rage (1.5 gallons) and then sanded most of it off. I probably also spent too much time on rage, and could have switched to FF G2 sooner.
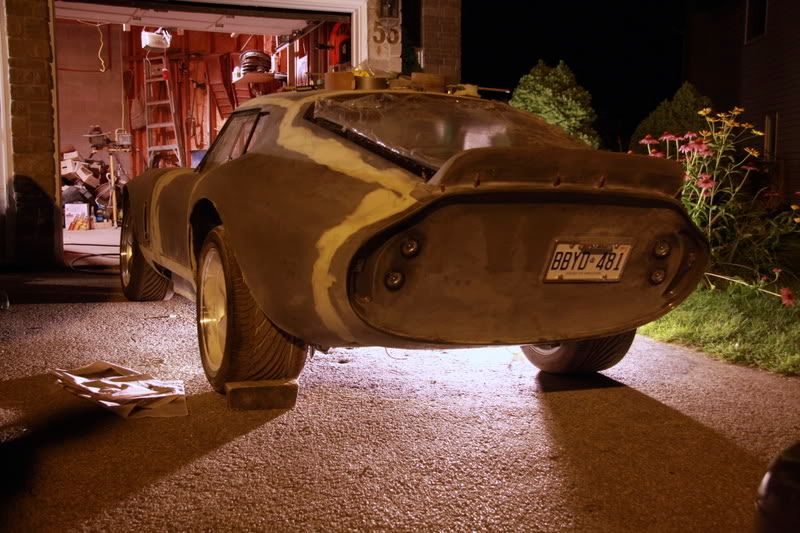
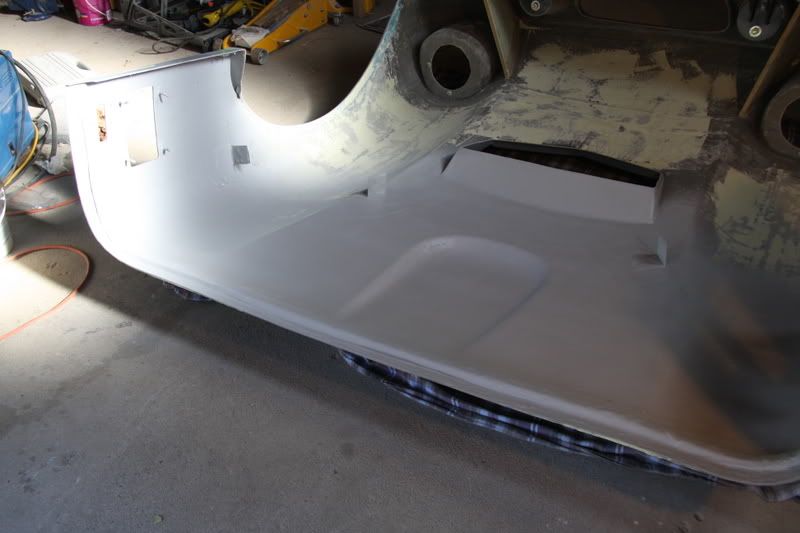
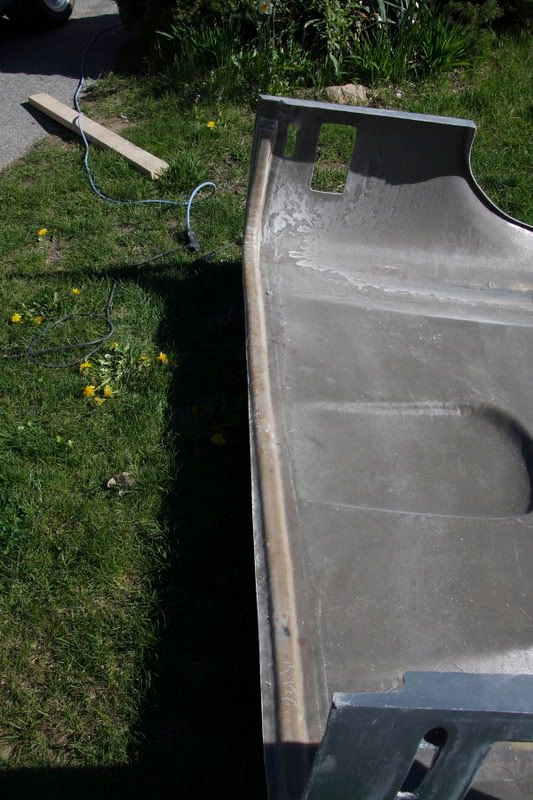
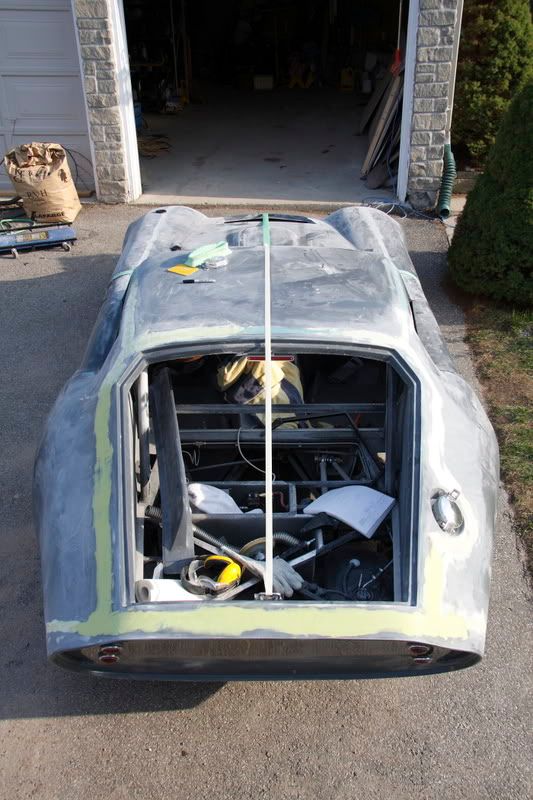
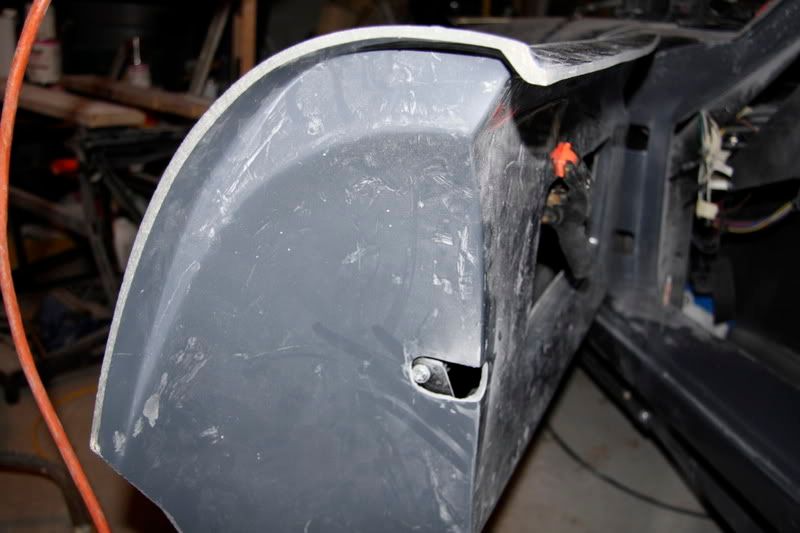
We sprayed bedliner on the inside of the nose prior to shooting primer on the outside. It provides a good texture that covers well. I started to finish the inside but it is too much work, with multiple layers of fibreglass patches and mounts for the wheel wells. I made four 90° flanges to mount the upper wheel wells from aluminum sheeting. They work well and provide additional support compared to the designed support.
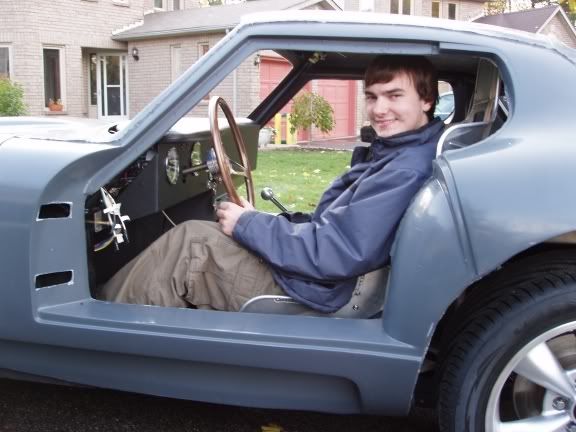
The most fun was getting everything mounted to drill all the holes through the body. Fun, because we had to go for a few test drives! My daughter and I drove through the neighbourhood to show it to one of my buddies. Also had the sidepipes ceramic coated, mounted the rear window / hatch, doors and side windows, head lights, etc.


Aug 2008 -
We've done lots of work since our last update. The RAGE step of body work is mostly finished and we're trying to get paint started before the end of the month. Some
of the body work has been very finicky, and we've sanded off most of two gallons of Rage. Most of the body is straightforward, and it simply required filler
over the seams. The main "pain" sections were the panels between the nose and the door and around the doors. We've never done this before, but the steps
we have followed are:
1) seams - cut and fill with hsrf,
2) mount all panels and doors,
3) add fibreglass layers to panels that are seriously low (panels between doors and nose, and inner rear of doors),
4) use Rage to align panels,
5) sand and sand and sand - make everything smooth and blended,
6) work on gaps - aim for 1/8" everywhere,
7) relieve edges so that they aren't harsh and are hopefully less prone to dents and scrapes,
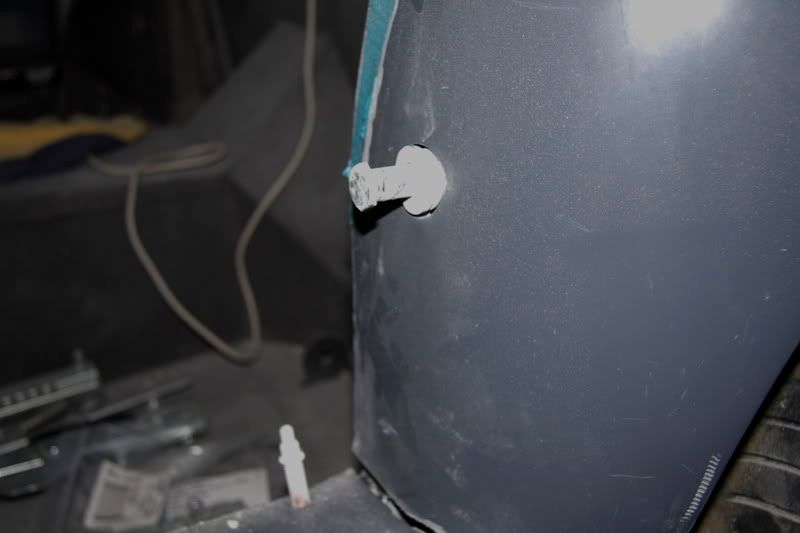
8) mount everything and drill all holes through the body so that you don't have to drill through fresh paint,
9) sand to 120, then 180, then 220,all sanding by block
10) 2 or 3 coats of FeatherFill G2,
11) guide coat and wet sanding to 320 and 400,
12) sealer, stripe color, then base color and finally clearcoat.
We're at step 6 right now.

May 2008 - It finally warmed up enough to do body work by May 20 so we've started to put the Rage in place.
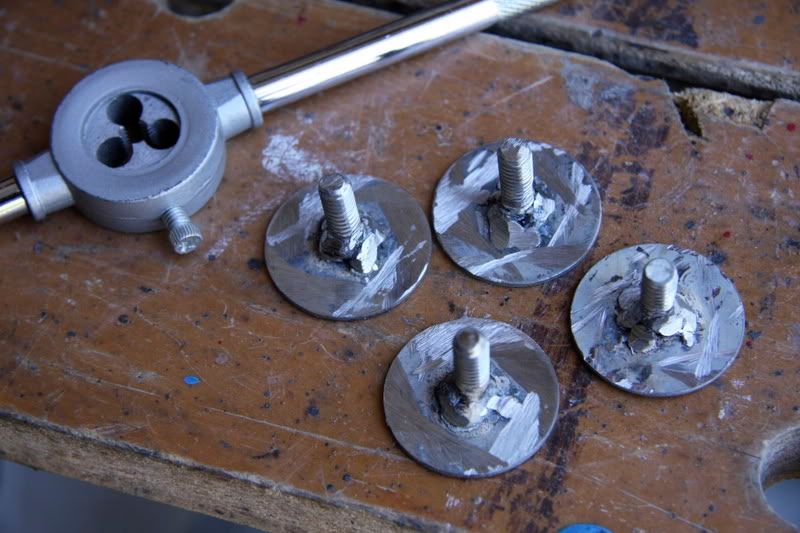
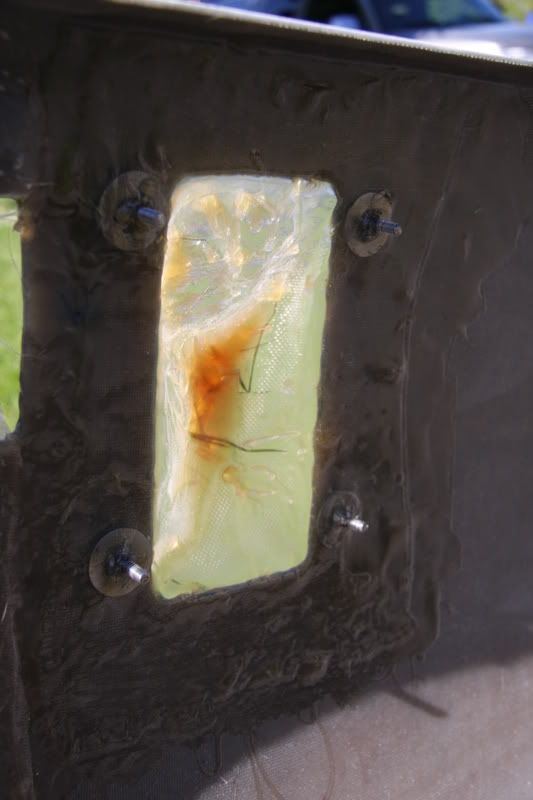
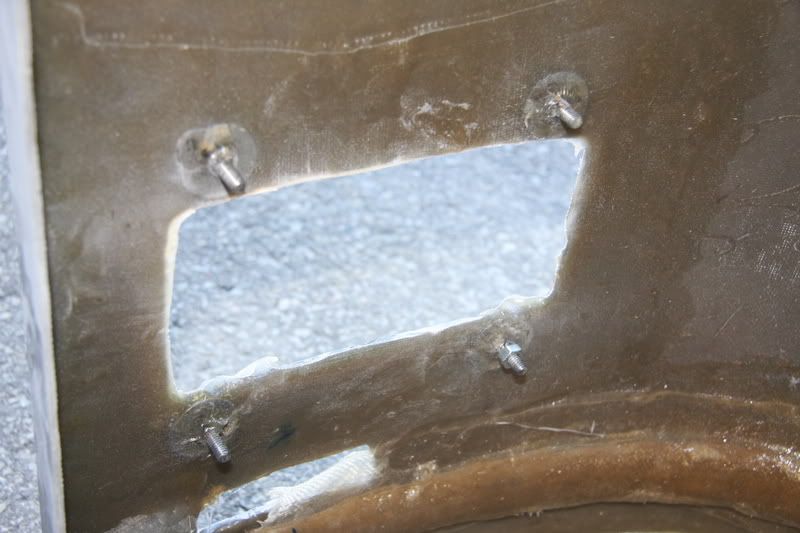
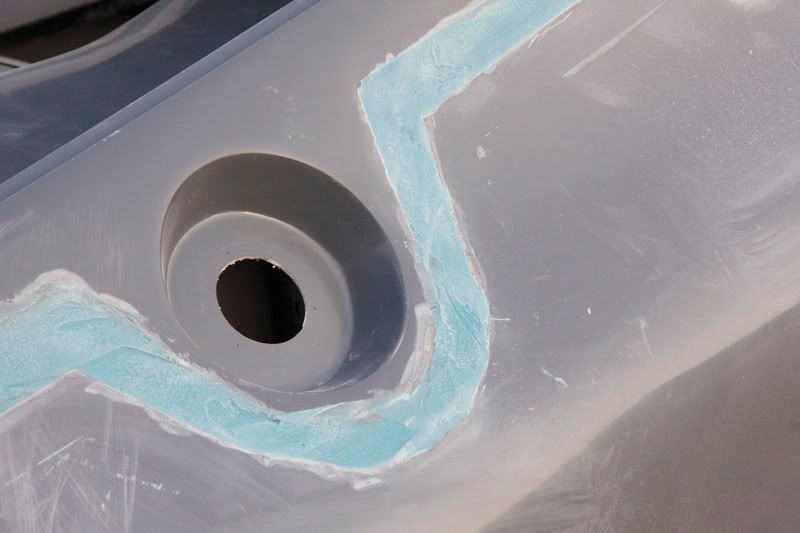
Made some hood anchors by welding fender washers to 1/4-20 threaded rod and then glassed them in place around the hood side screen holes. Have made an aluminum backing plate for the side screens.
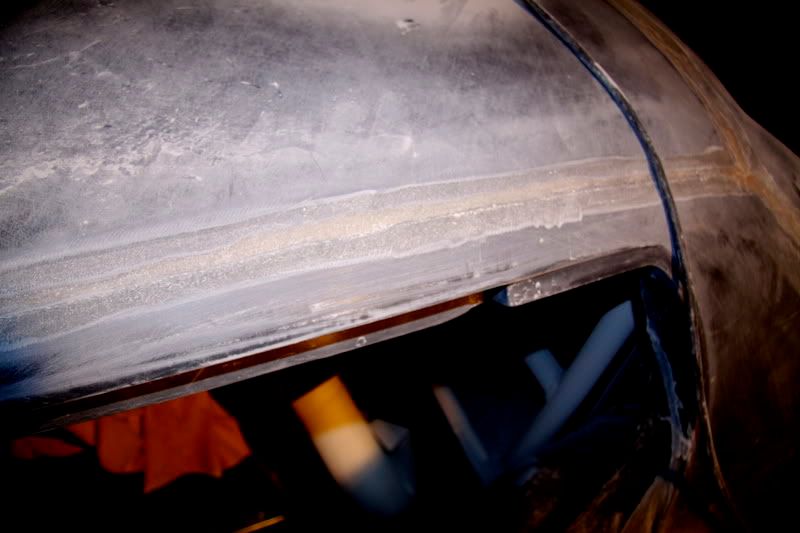
The stiffener on the hood was put on crooked and encroached into the trim line where the hood meets the body. We cut it off with a sawzall and re-fibreglassed it into the correct place.
April 2008 - We received a record amount of snow this winter, and a few really big storms. On April 1, we were still skiing and getting lots of snow. On April 15, we got a week of warm weather, then right back to near-zero for the rest of the month.
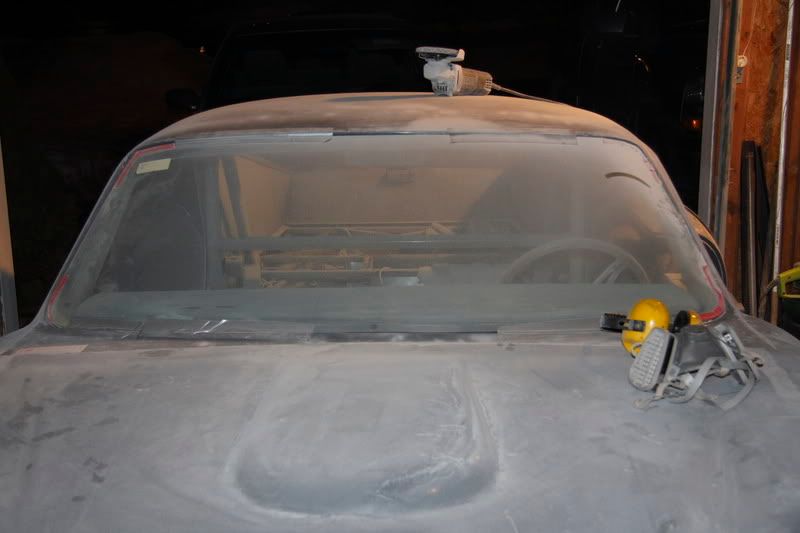
Didn't get too much done over the winter but a bunch of little things. The body was fit and mounted to the frame at each of the permanent mount locations. Added a 3rd brake light, and mounted the nose. We temporarily installed windshield because its weight could affect the fit of the doors. Had to take it for a little ride once we got the body on.

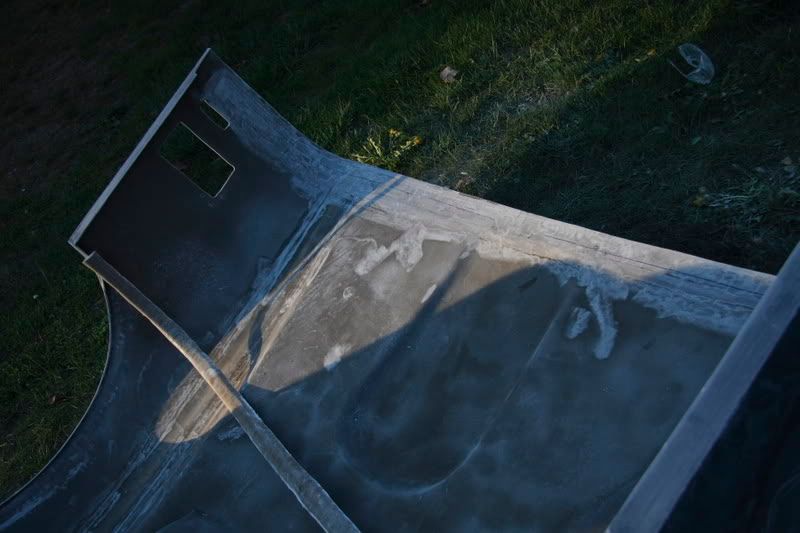
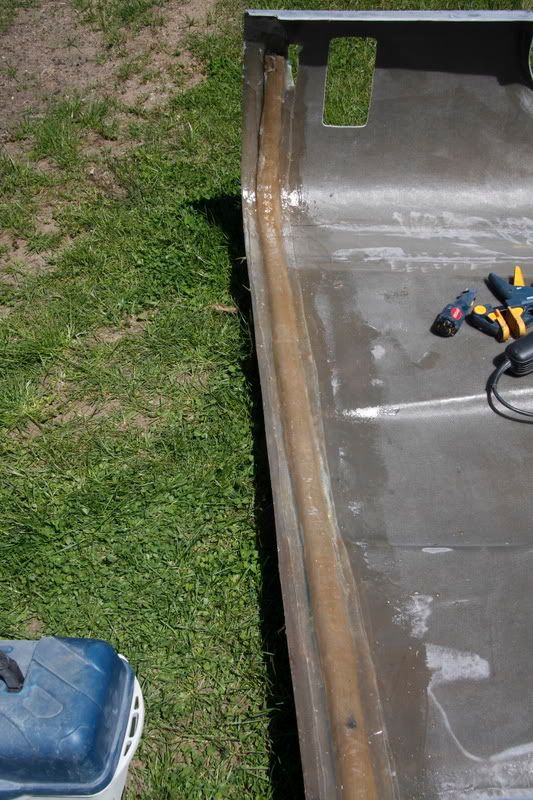
Started the body work, used a DA to rough up the gelcoat, flattened the seams and cut through the gelcoat in the seams with a 4" grinder. Some of the gelcoat was very deep (at the back) and my hood did not have any gelcoat in the seams. I then taped the seams and mstoly filled then with HSRF.

The door weren't difficult (so far) but needed thought to try a logical approach. I followed these steps:
1) installed hinges and door frame, and made the line up with the striker and latch. The driver side was correct and the passenger side needed
a washer to be place under the top hinge bolt to tilt the frame up slightly.
2) cut opening in skin to slide over the frame & fit door over frame.
3) opened door side so striker can reach latch
4) installed the striker but had to use a number of washers on both sides to push the striker further into the frame. The striker has to be about 1/8" too
far out to match the body, which means that the striker doesn't go completely through the nylock. Something to change in the future....re-weld the striker
mount or find a longer striker.
5) the door skin hangs up on the end of the frame at the latch so I need to find a way to shorten the door frame.
6) next steps are to attach the door windows, then gap the doors and permanently attach the skins to the frame.


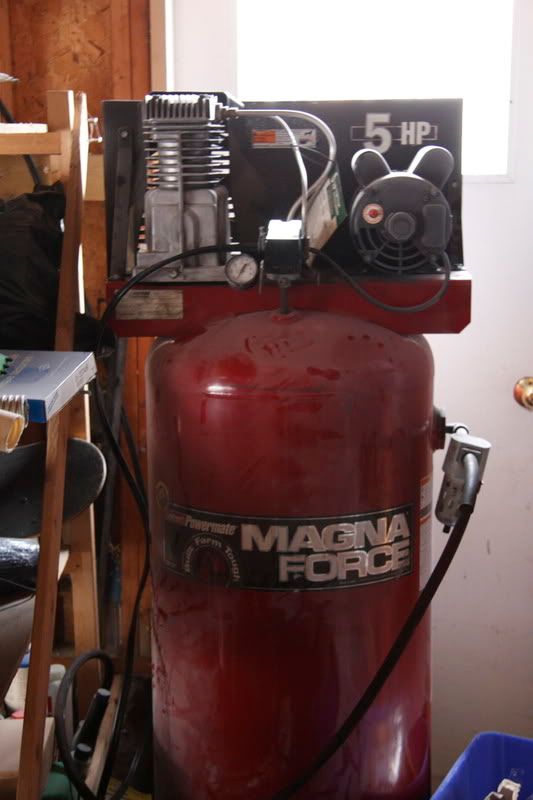
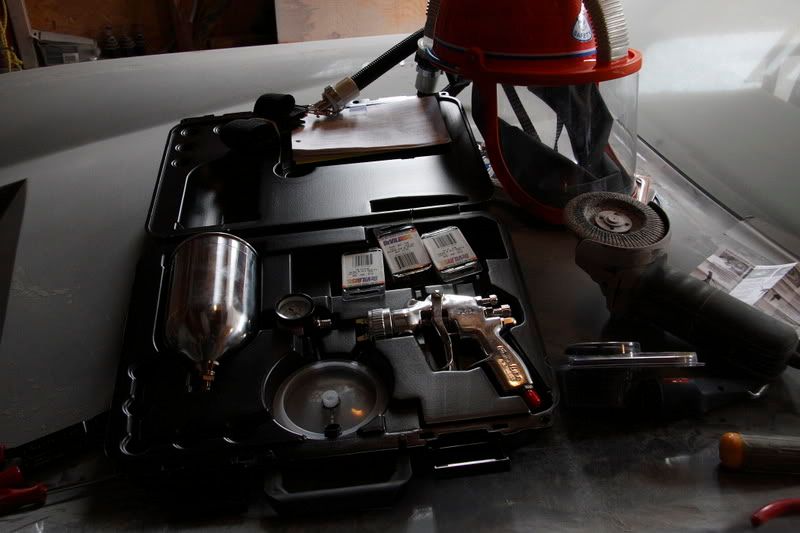
I started to acquire all of the tools and components to do our own body work and paint. Although unconventional, we're thinking about using AutoAirColor water-based paint as the basecoat, with a PPG clear. The other alternative is all PPG. Bought a 5hp compressor, a Devilbis paint gun and a remote air supply / face shield.
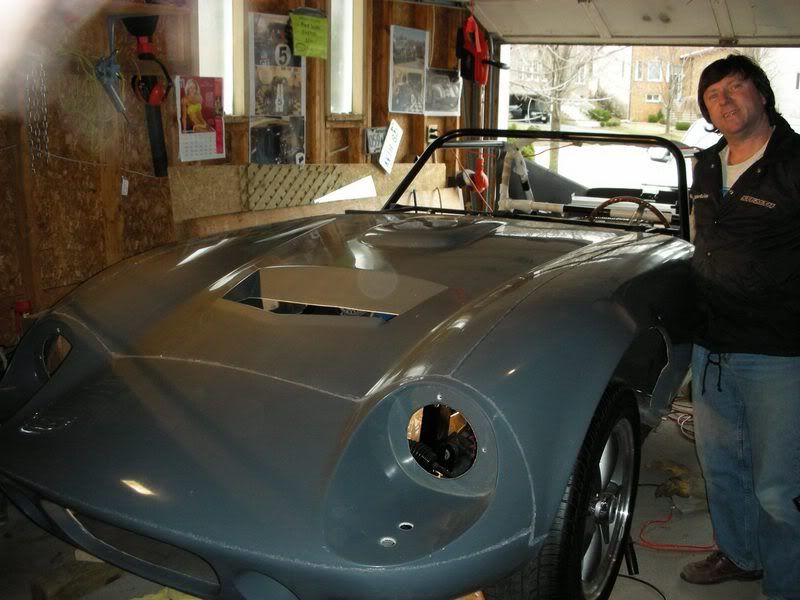
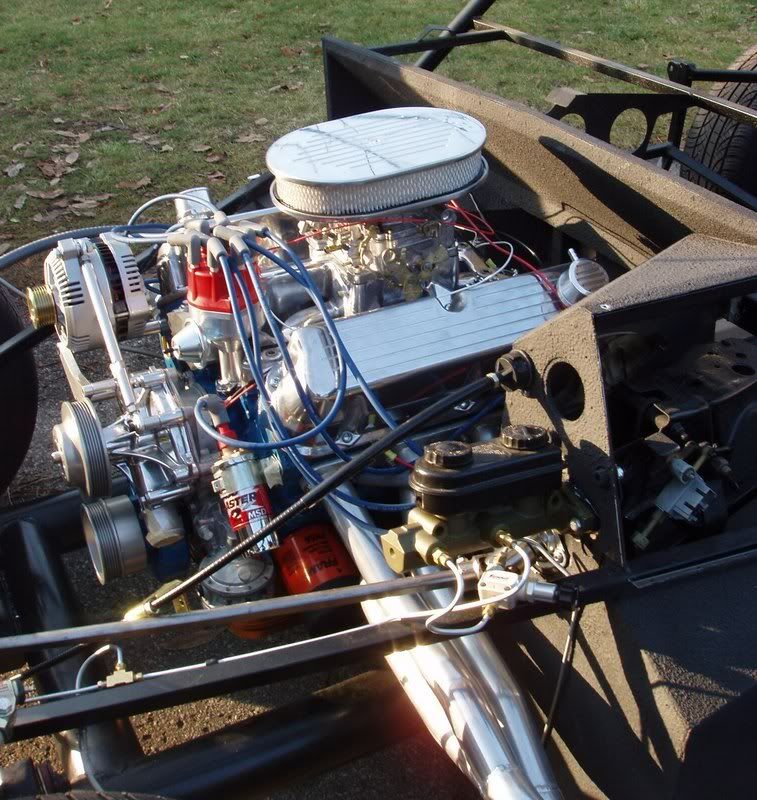
October-November 2007 Finished up the main wiring and have been trouble-shooting / tuning the engine. Had several hurtles to overcome - rad hoses popping off (gave Pete a bit of burn with hot fluid!), re-routing cooling hoses and cleaning things up. Had Shawn Campsall come to check timing, etc and he identified that the accelerator pump in the carb (Edelbrock 1406) wasn't working so replaced the carb. Added the side pipes so things are much quieter than with headers only. Last weekend of Oct, we mounted the body as a trial fit which went pretty smoothly.

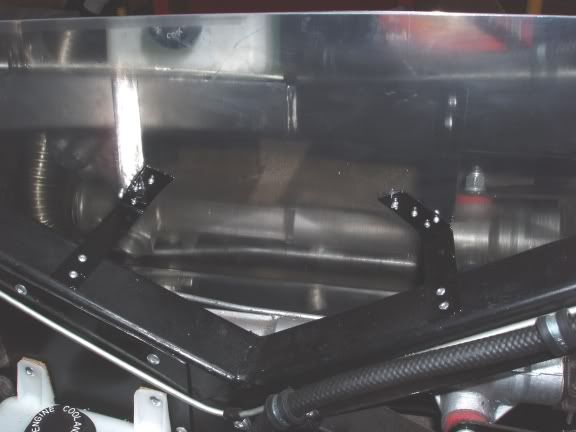
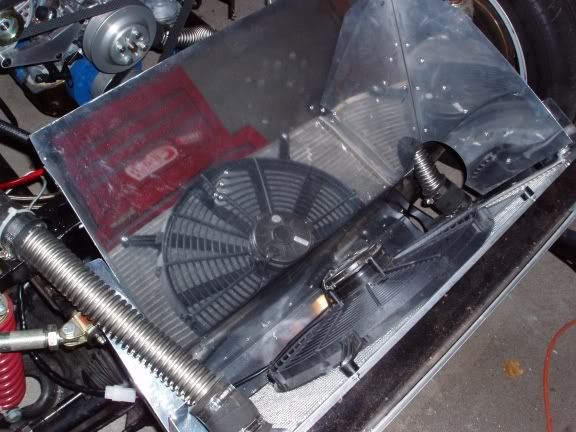
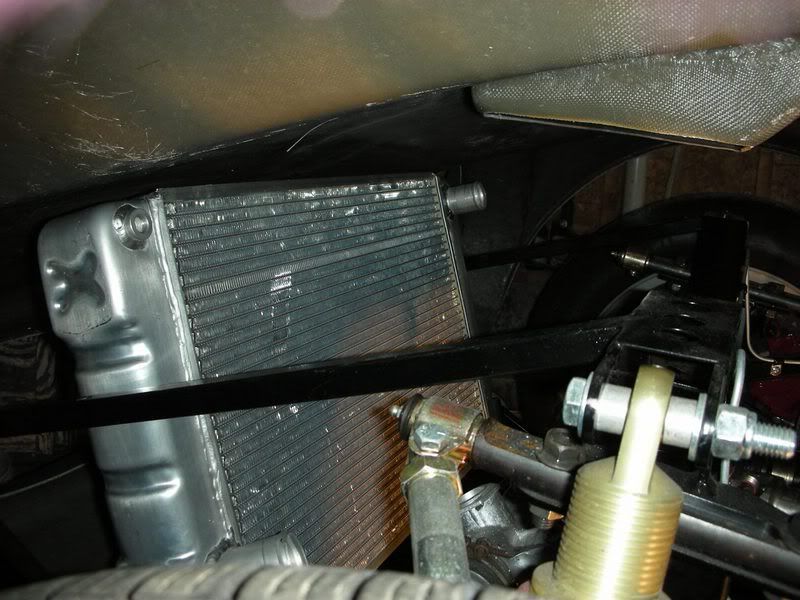
Added the rad aluminum and polished it since you will see it through the hood. Needed to mod the pass side mount to give clearance to rad hose but rest was fairly standard.

Late August - Labour Day weekend 2007 - Engine Start
Mounted the MSD 6A on the passenger side footbox, along with the starter solenoid, a
buss bar and alternator mega-fuse. I did a number of things wrong, like reversed the connections on the mechanical
fuel pump (so it pumped in reverse) and initially set up the distributor at TDC on the exhaust stroke instead of
the compression stroke. However, once we got everything connected properly, it started right up and ran very smoothly.
Ran it for about 20 minutes, and then drove it back into the garage!
VIDEO OF FIRST START
Higher res (5megs) on the left, Lower res (photobucket)on the right

The next day, we started it again and ran it up to temperature, after fixing leaks etc. Then we decided to see if the clutch works and go for a drive around the cul-de-sac. Worked great, made a lot of noise and got a standing ovation from the neighbours! It feels good to reach this milestone. Took several days for the smiles to go away.
Higher res (15megs) on the left, Lower res (photobucket)on the right


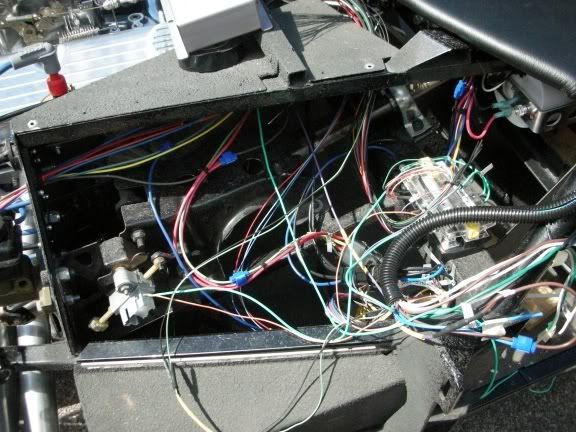
August 2007 - Have been working away on electrical and finishing touches on different mechanical parts. Made some major progress on a bunch of little things, all that take a great deal of time. Installed the I-Squared electrical system. It consists of two controllers - the Master Controller is essentially a switch / relay bank that all switches connect to. It is all low amperage and connects to the Power Controller via a serial computer cable. The Power Controller is a "smart" fuse box that allows each curcuit to be controlled and timed. Very easy to work with, and high quality components.
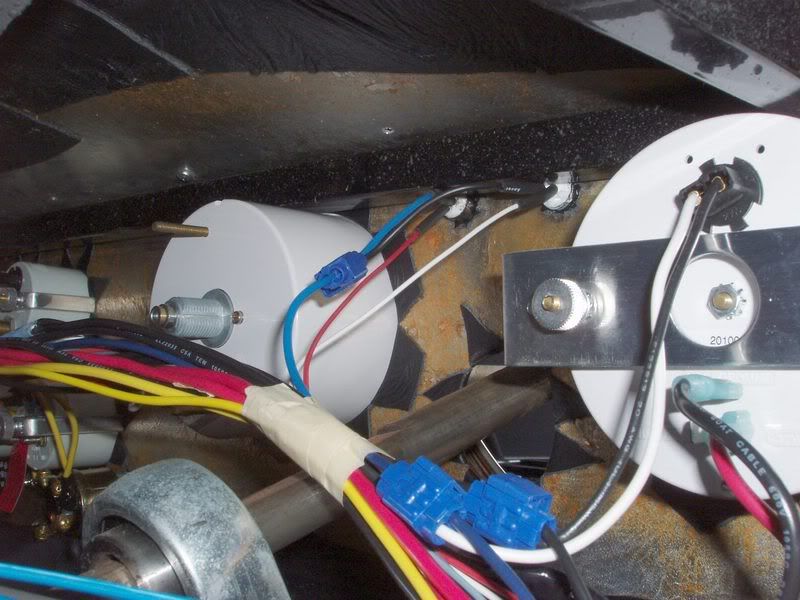
The Master Controller is mounted behind the dash on the driver's side. The Power Controller is mounted in a storage box in the rear. Need to work out a cover and provide ventilation, as the rear floor will be carpetted eventually. Most of the wiring sphagetti is behind the dash as this is the main connection area for the two controllers, dashboard wiring and the wiring from the engine area. Looks messy initially but cleans up with looms and zip ties.
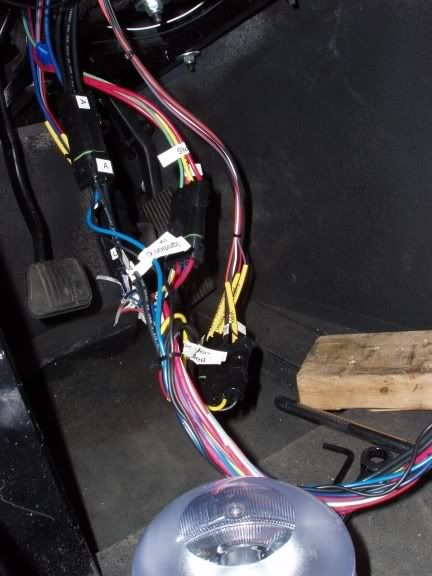


Dash wiring was completed and the dash was installed temporarily in the car to connect all controls for engine start. I made the dash removeable by using weatherpack fittings for all the wiring. By removing about ten metal screws and the sensor wires/capillary tubes, it can be lifted out. Still have to install the heater/a-c and the radio. PHOTO OF PLUGS and DASH WIRING
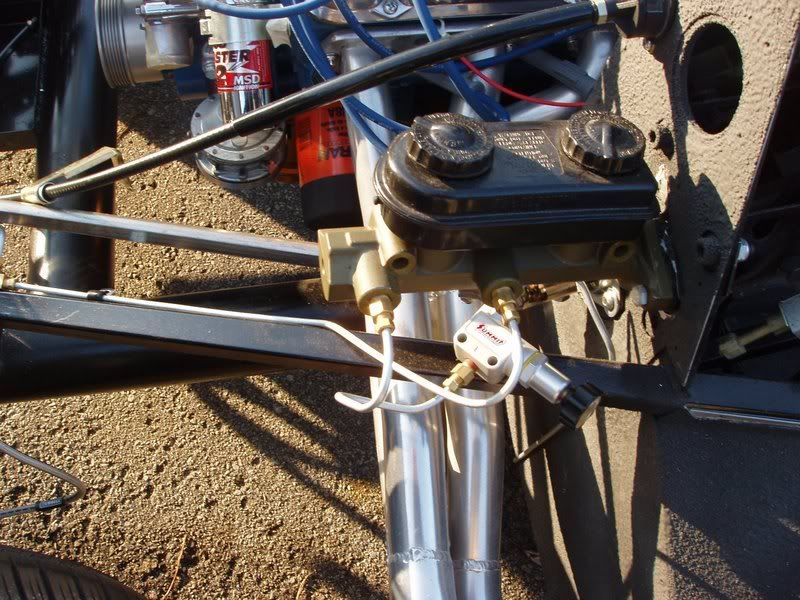
Had a few setbacks, like I pulled all of the brake lines that I had put in and re-installed using ready-made lines because I was having miscellaneous problems with leaks. Then, I nicked a brake line with a grinder when I was installing the battery ground terminal. At least I'm getting practice.
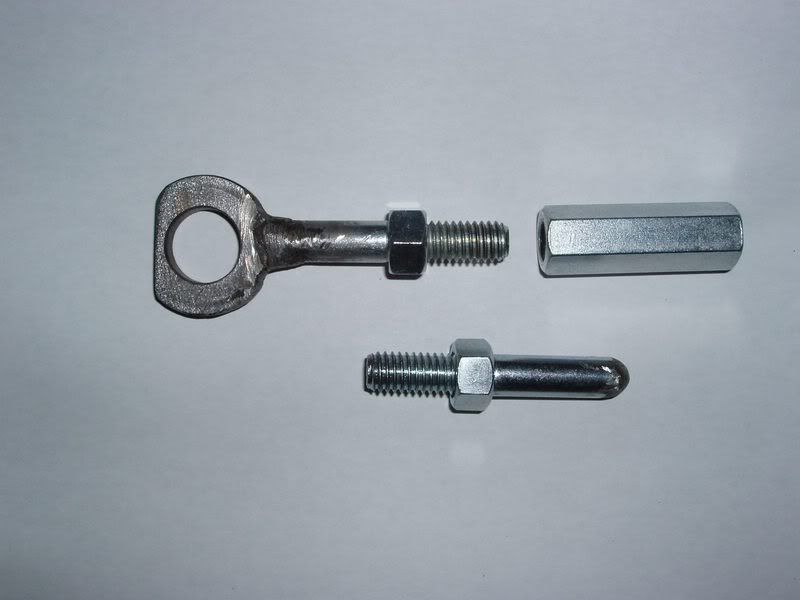
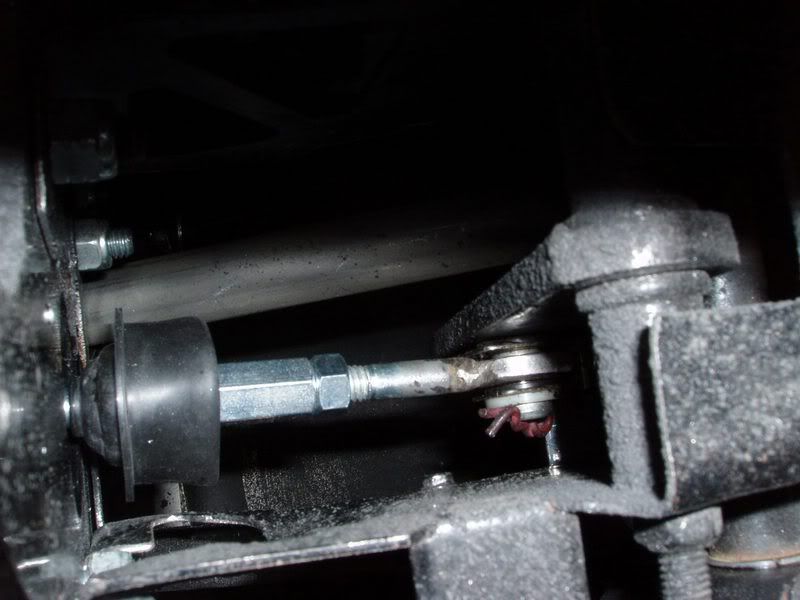
June 2007 - Connected up the clutch cable and the brake pushrod so two out of three pedals work. I don't know where to connect the clutch cable support, and it is supposed to slide, but it doesn't do that very well. I am using a Strange dual master cylinder (manual) and it comes with the front part of an adjustable pushrod. Since I don't have the donor one (which is power-assisted), I made one using a spacer, two grade 8 bolts and an adjustable nut. Worked like a charm! I'm getting very anxious for that first start.
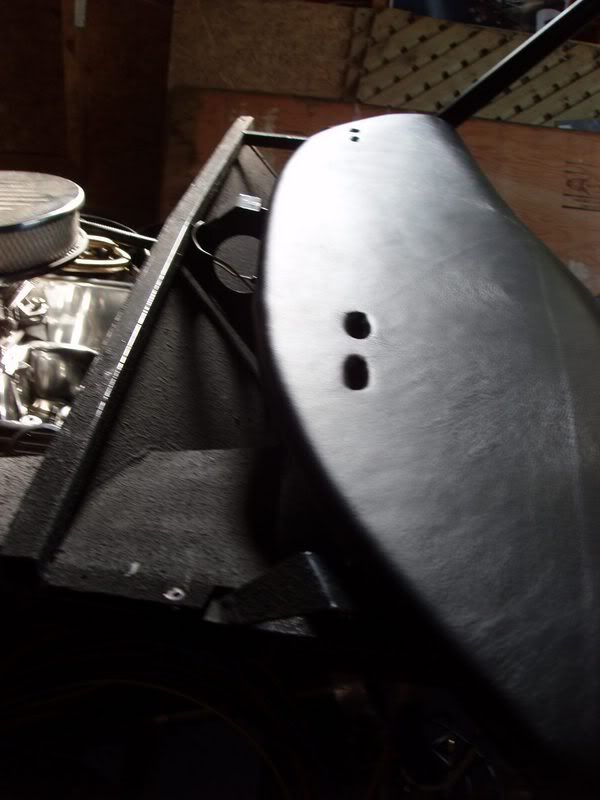
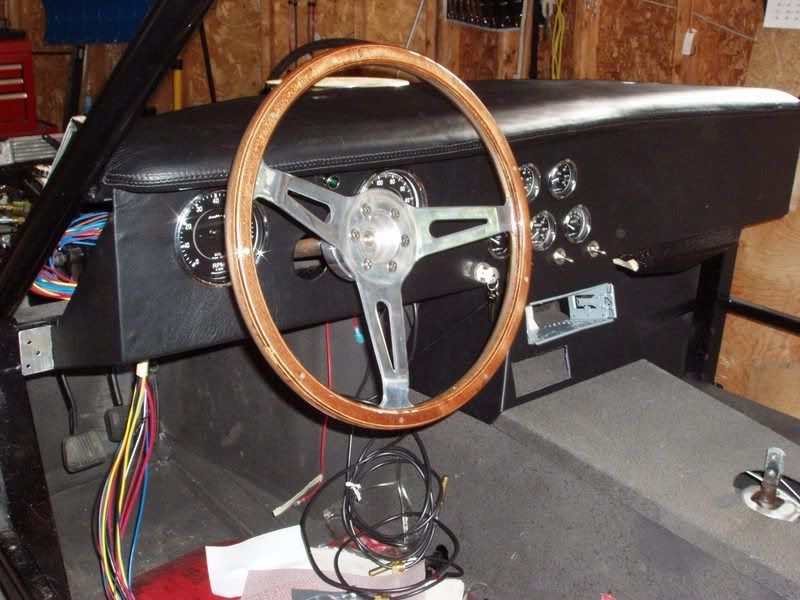
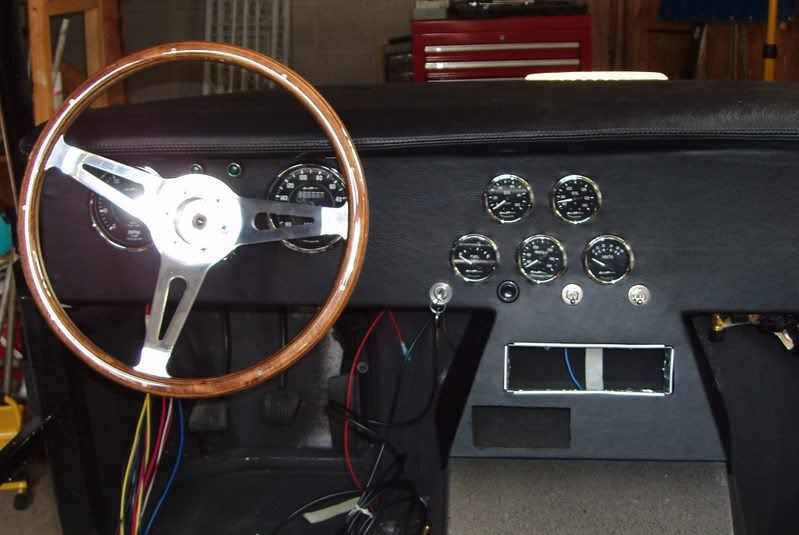

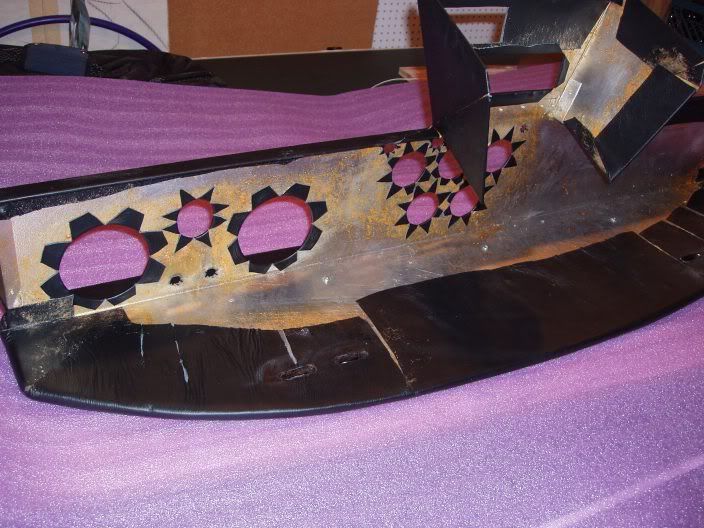
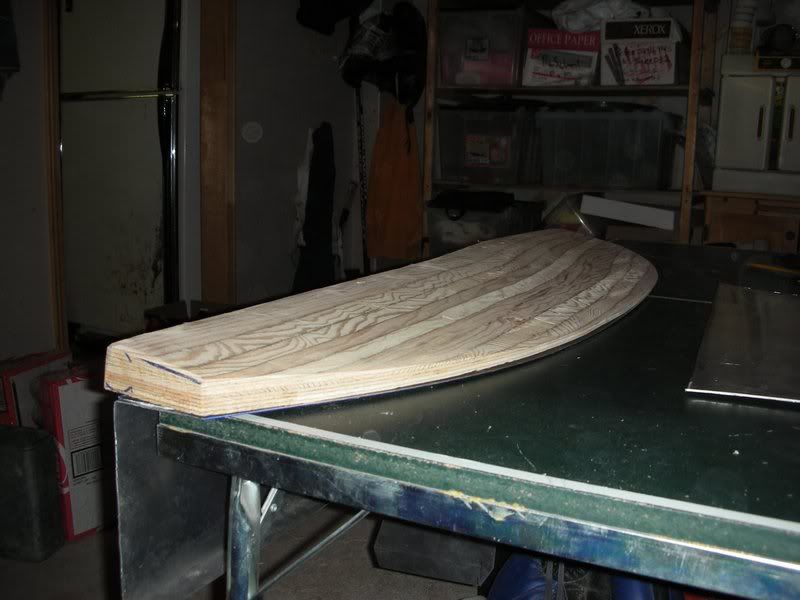
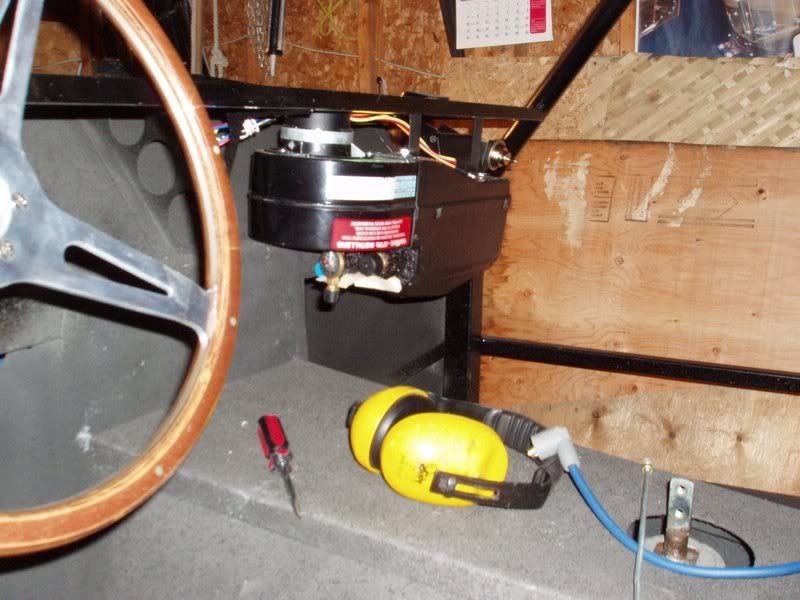
May 2007 - Spent a lot of time working on the dash. It has gone through a number of changes over the winter - first we added a wooden top and contoured it to provide a sunshield and some thickness and shape. The leather covering was completed by Leatherworks, a local company. Then, the gauges and switches (high / low beam lights and fog lights) were added along with stereo and heat/ a/c controls.
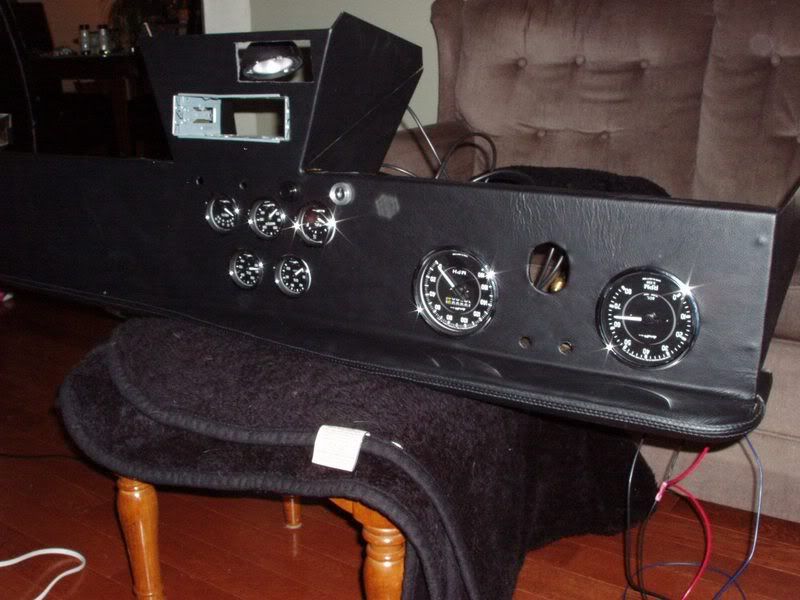


I also cut the bulb out of the turn indicator lights and installed LED's as is required for the I^2 squared system.

April 2007 - Trial fit the nose clip to check for clearance around the radiator. I think that the clearance is marginal so decided to lower the rad mounts by about 0.75". This will allow the rad strap to mate properly to the frame as well.


Feb 2007 - Too cold to do much in the garage. Spent much time reading about wiring as it isn't a concept that comes easy. We are using the I^2 system along with their advanced security system and door poppers.
Jan 23, 2007 - Long time since I've updated - it seems like we haven't got too much done on the car, but we've put in lost of hours on the small stuff. Our weather has been very forgiving, with temperatures above freezing until Christmas,a with very little snow. For comparison, one year I had the kid's backyard rink ready to go on Nov 11, and it stayed until the end of March. The car has sort of taken over our garage, even thougfh I had promised my wife that she could have her half back once the snow comes. We're still working at it, but a bit slower with the cold weather, and other commitments, like school, hockey and work.
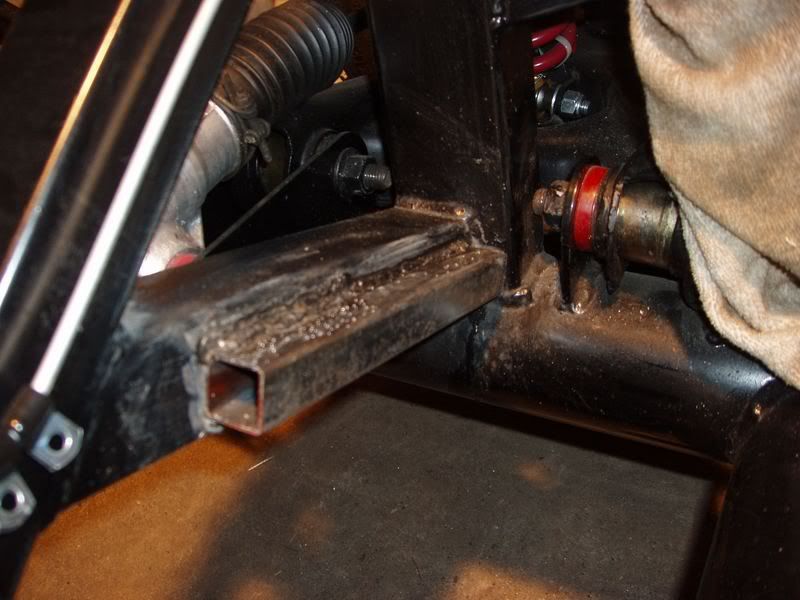
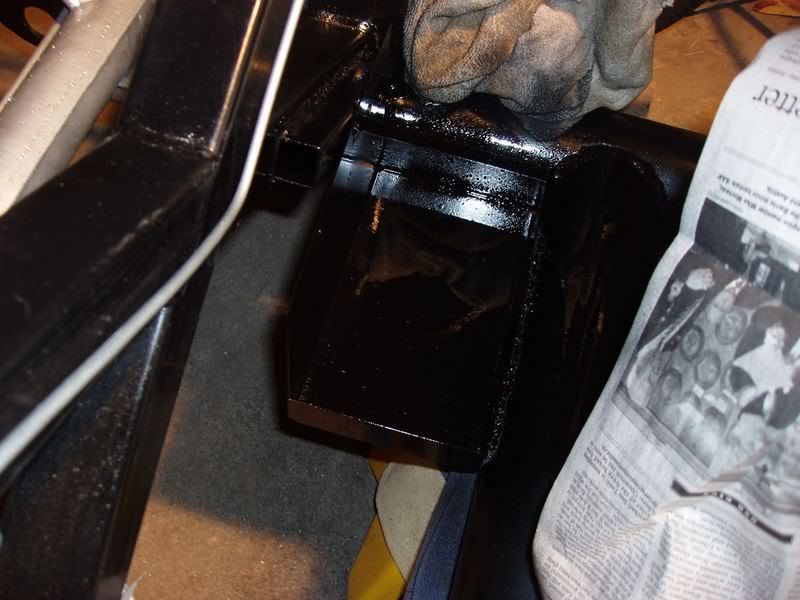
We added the battery box on the inside low passenger side of the X-member. I used the roadster box from Breeze, and had to add a 1" square spacer to the X-member since the roadster frame spacing is shorter.
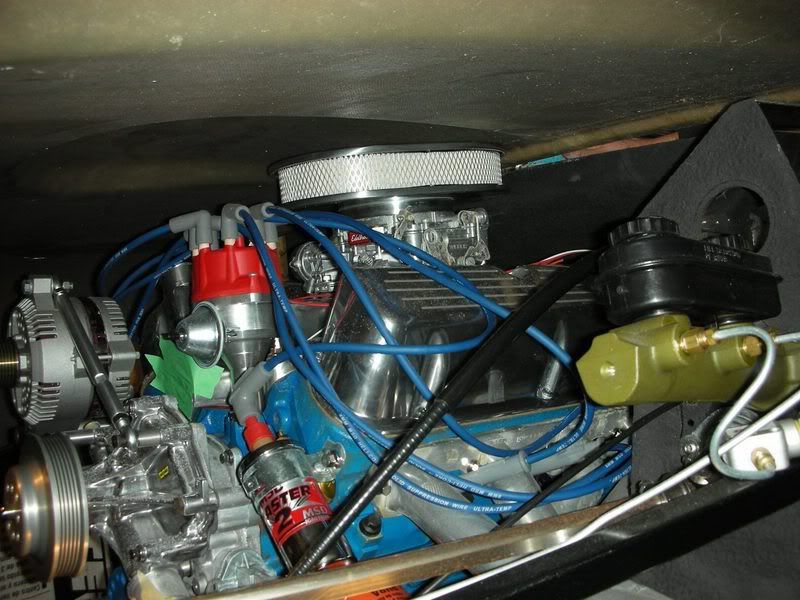
We've started on the engine wiring, adding the MSD 6A box to the passenger footbox. The various engine components have been added, like MSD Blaster 2 starter coil, MSD billet distributor, MSD Heli-core wires, Edelbrock 1406 Performer carb, ball milled air cleaner and valve cover breathers and stainless steel braided fuel lines.


Our dash is going to have a number of mods. We're test fitting a built-in aluminum sun shield. Contour will be added using dense polyurethane foam and closed cellular 1/8" foam, then the whole thing will be covered in black leather. This will be one of the main winter projects since it can be done indoors.

Most of the brake lines have been added. The fronts are complete and the main run to the rear is done. I'm going to split the rear using a "T" with hard line attached to the frame to each side and then braided steel line to each wheel (same as the front). However, I'm running 3/16" lines, and 3/16 "T"'s are not available in Ontario. I've ordered them from Smith Fasteners (they're great and have everything), and they just arrived.

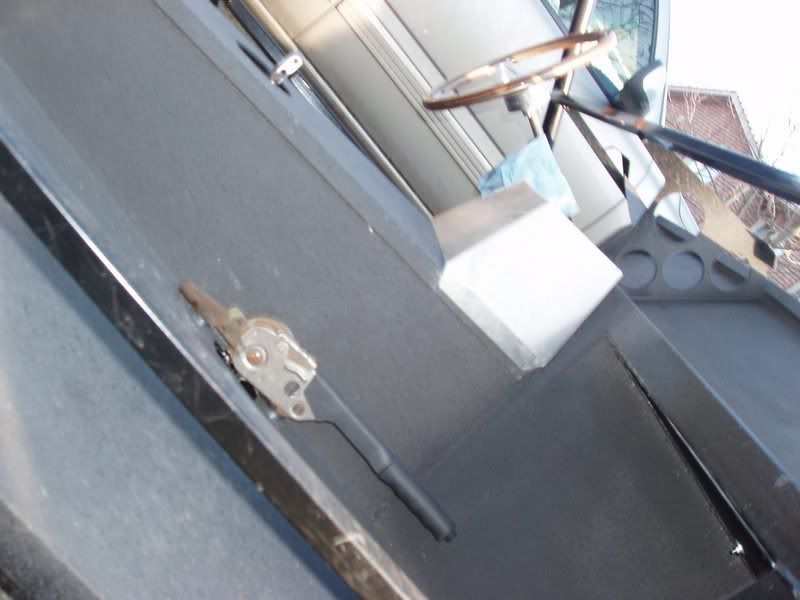
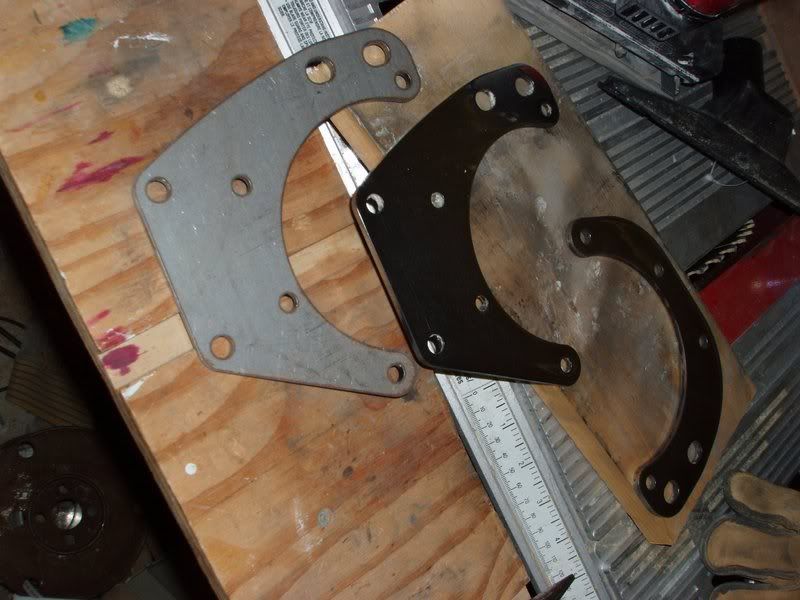
Test fit of air conditioner / heater and ebrake handle. Also polished the a/c bracket since the original was unfinished.
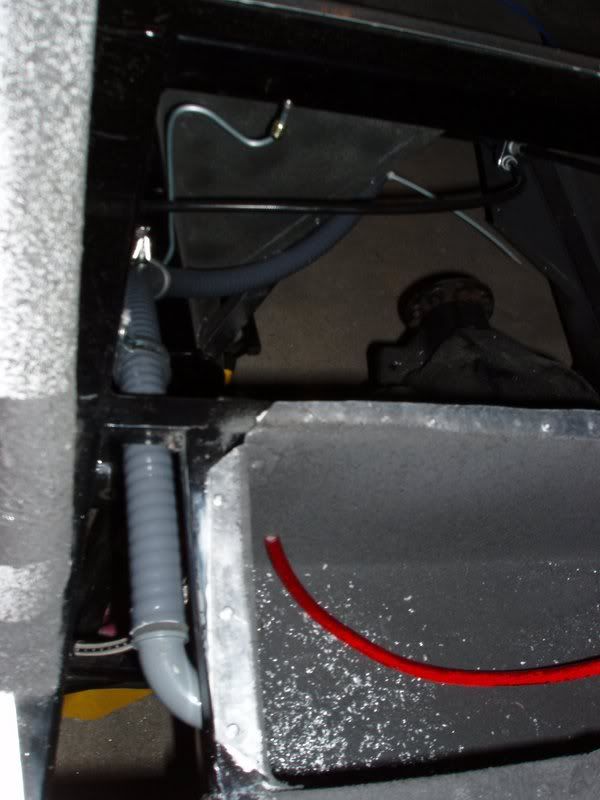
Main electrical wiring is going to to be done using the I^2 system. The controllers are going to be mounted in the first storage box in the trunk. Conduit has been run for the main power lines (down outside of passenger side 4" rail) and the main dash wiring (along side of tranny tunnel). If I can, I'll run a third conduit down the outside of the driver's side 4" rail for stereo wiring, and the stereo amp will also go in the same storage box.
Miscellaneous shots of roller on Dec 17, 2006. Note the complete lack of snow. We'd had 2 feet of snow during first week of Dec, and it all melted.


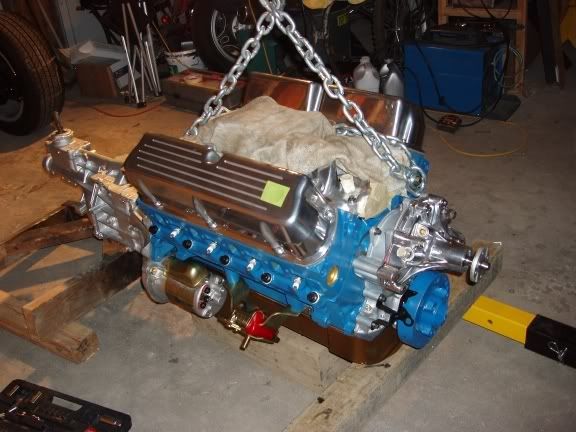
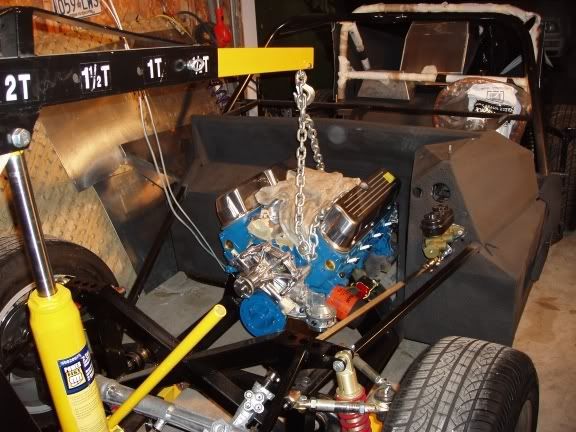
October 7, 2006 - Last weekend we completed the roller stage and this weekend (Thanksgiving) put in the the engine and transmission. Everything went in really well, I was worried about tranny and the bellhousing since they are from the donor. Seems like the engine sits a bit high, but we haven't bolted down the engne yet, nor checke it for alignment and level.


The following video is of the first "roller" drive, pushing the car around our cul-de-sac.

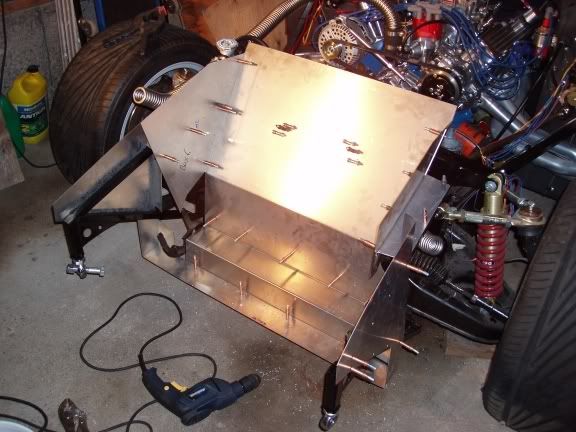
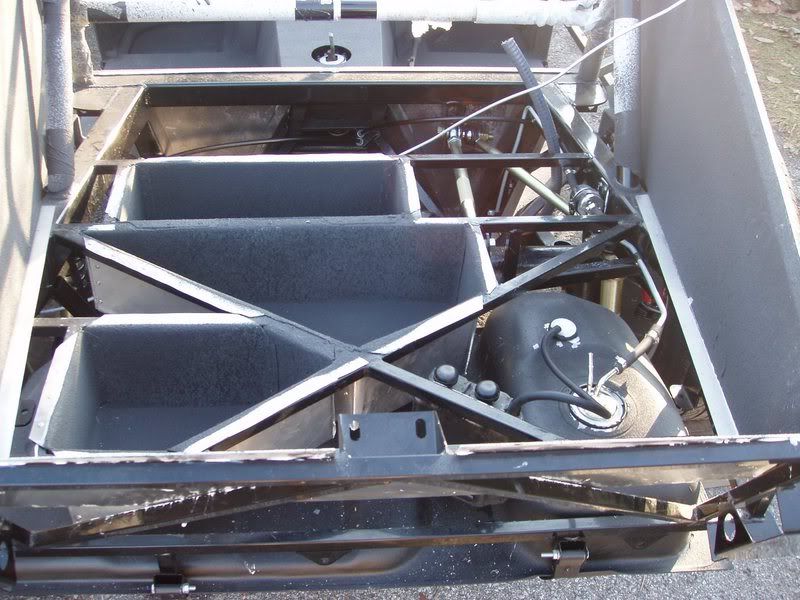
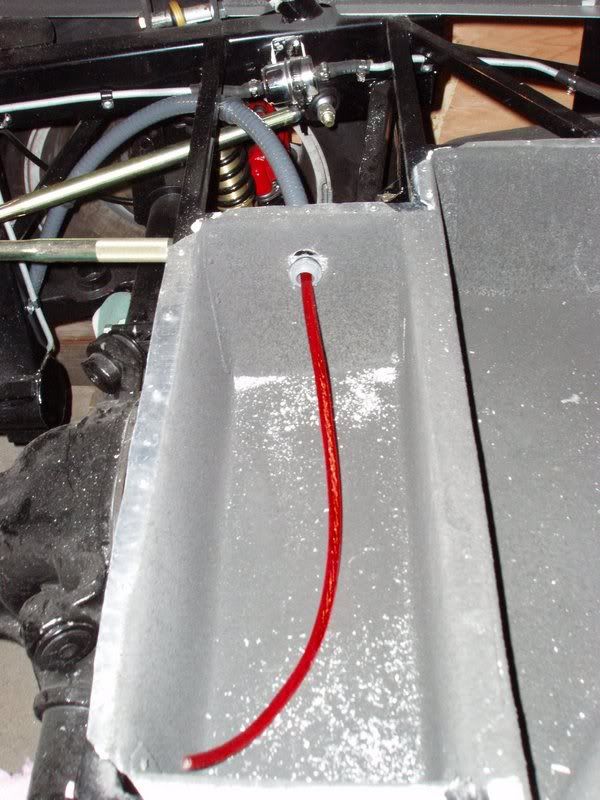
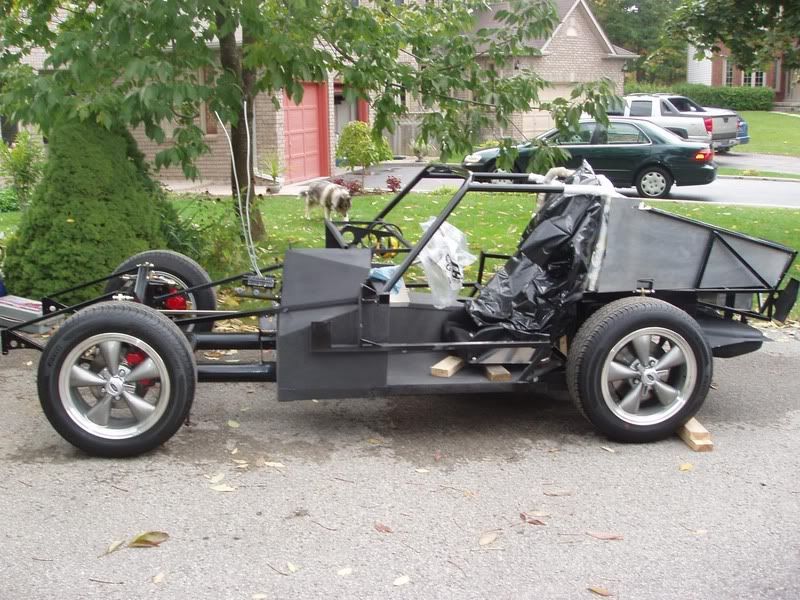
Sept 22, 2006 - Summer's done and we're pretty far behind where we thought we could be. The plan now is to get as much done as possible before winter comes, and then finish in the spring. It's a journey, right? The last six weeks have been pretty busy. We decided to make some storage boxes in the rear and use Lizardskin for sound and heat insulation. Fuel lines are in, as are spacers and suspension is torqued down.
I put Lizardskin sound product on the inside of the cockpit, tranny tunnel, outside of the firewall, inside of doors and rear deck. It appears to makes a huge difference in resonance and appears to be well worth it. Then I applied heat insulation over top of the SC, but just on the inside of the footboxes, outer tranny tunnel and firewall. It is messy to spray, and I had problems getting the Sc to spray from the bucket but it worked fine using the Lizardskin gun. The heat insulation sprayed much easier. It creates a rough textured surface that will be visible on the outer firewall, but all of the interior surfaces will be coverd in carpet.
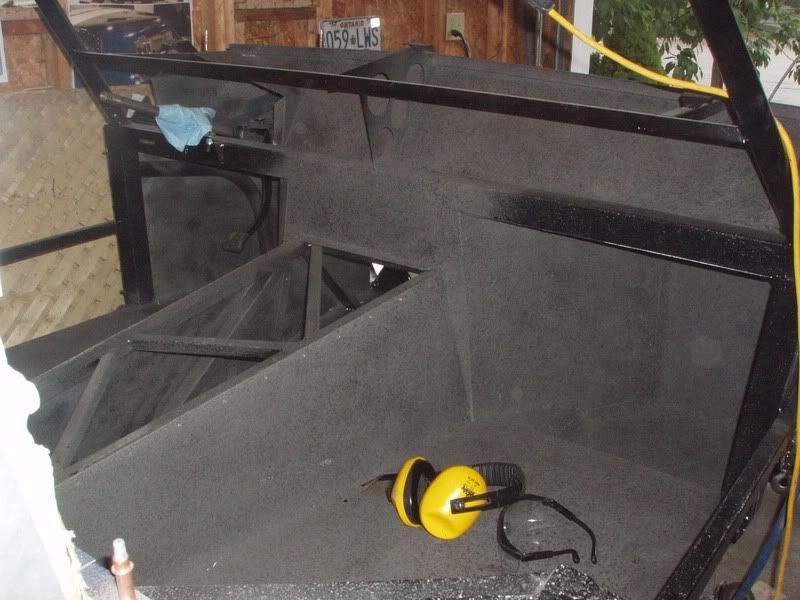
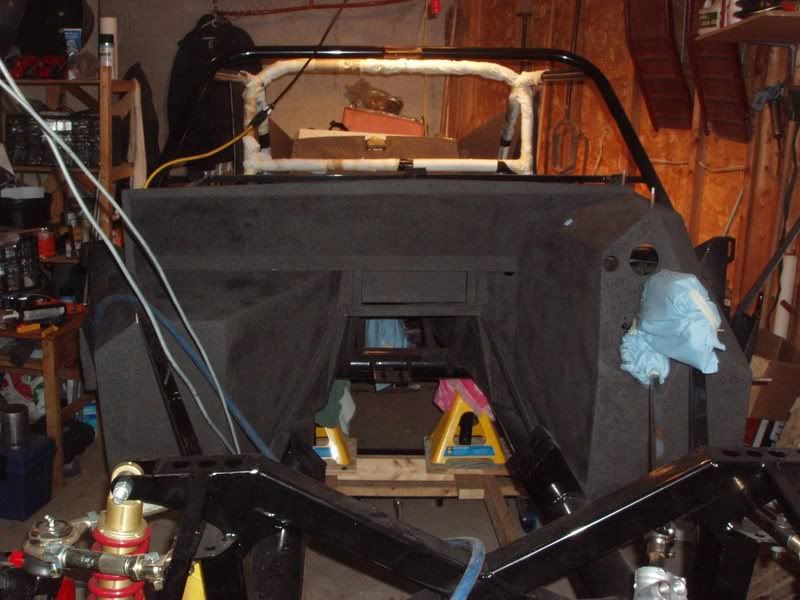
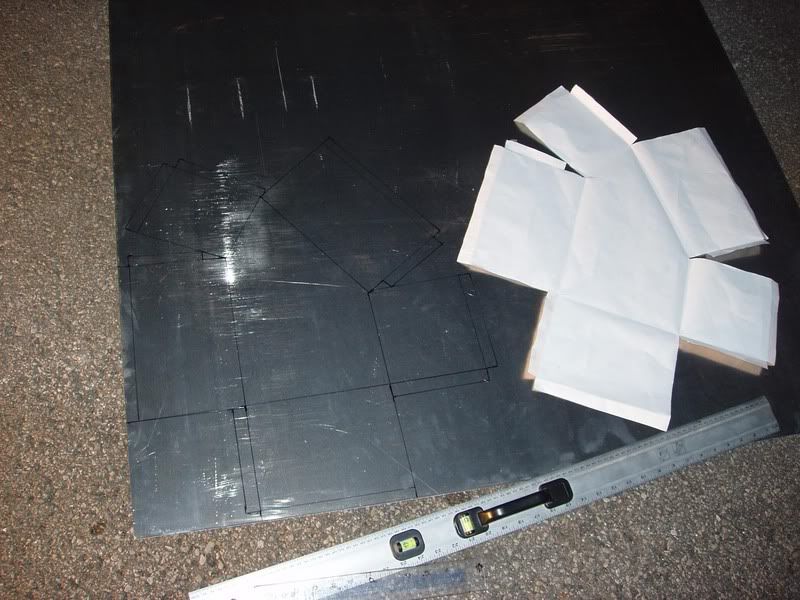
Peter made paper templates of the three storage boxes, and I cut them from .051 T6061 aluminum and bent them. the first one was pretty rough (and was junked) but by the end, they looked pretty good. They were rivetted in place and then coated with lizardskin too. The rear two are for general storage, and will have a magnetic cover. The front one will be used for the I Squared System.


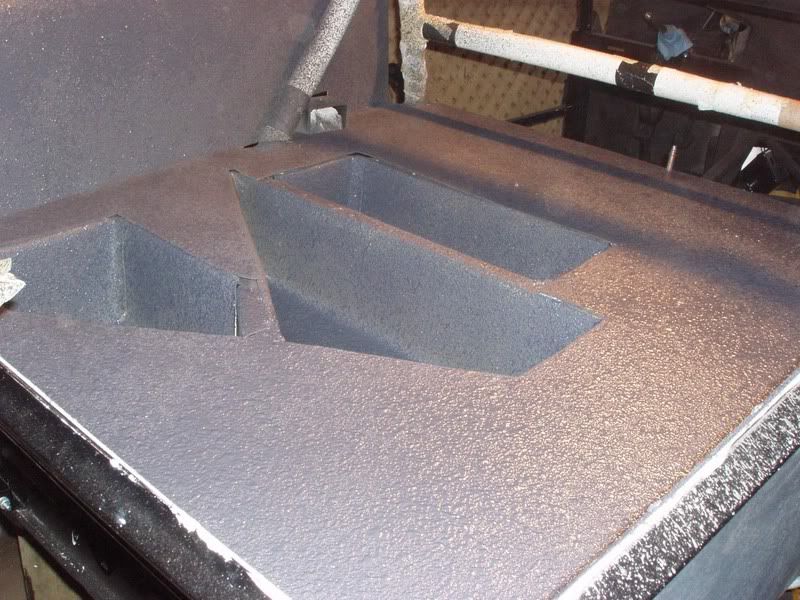
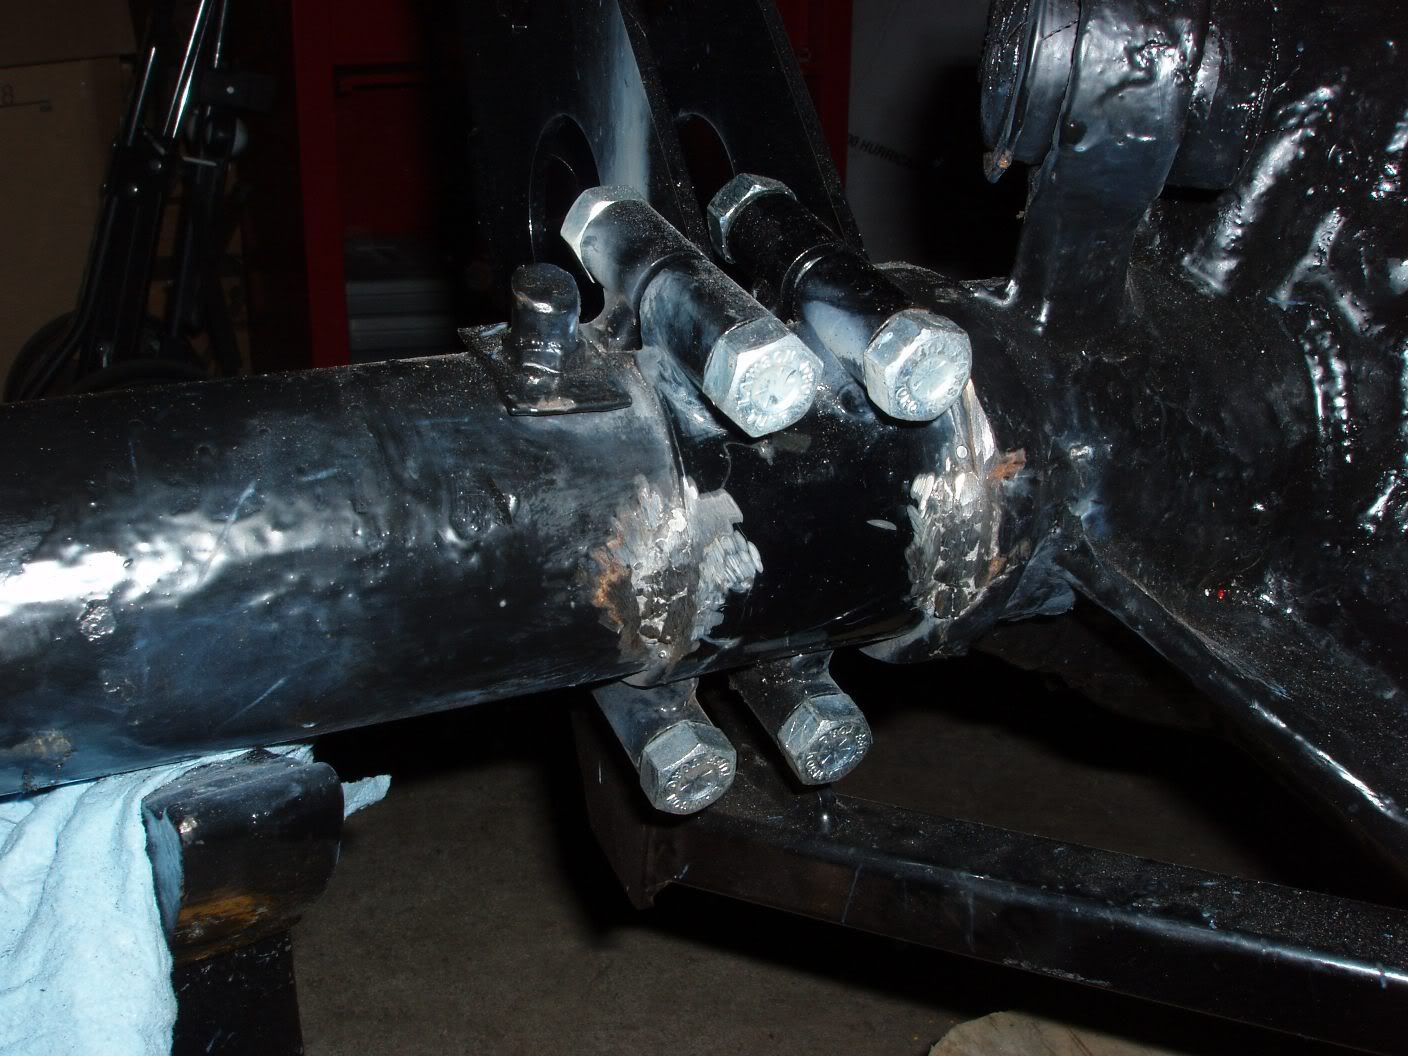
I welded three new cross members onto the rear deck chassis to support the new storage boxes. painted black, they almost look like I know what I'm doing. My welding is pretty rough.
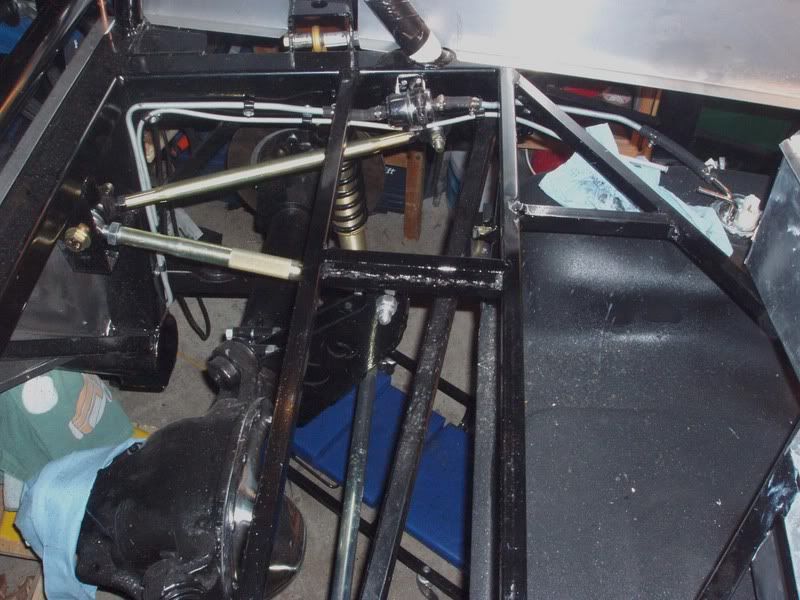
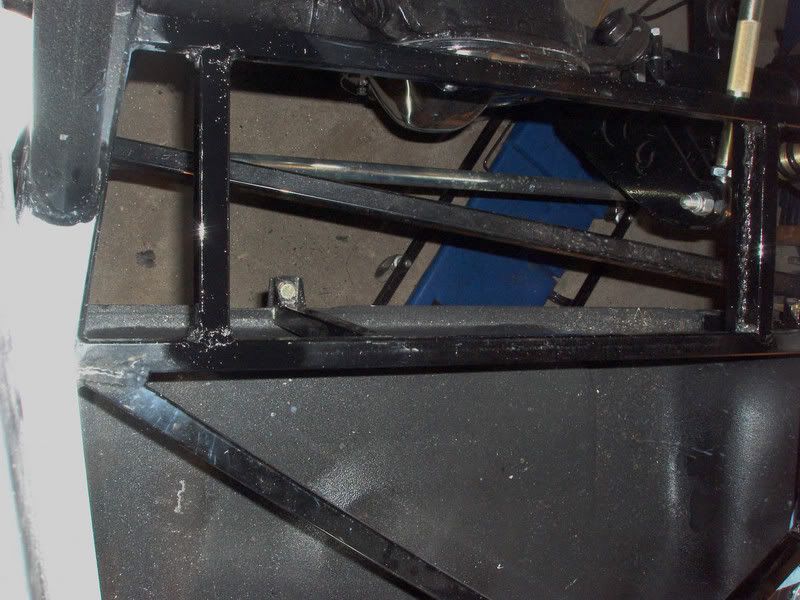
Added the extra 3-link brace. Its probably overkill given the daily driver status of our car, but....
Photos show the gas lines at the tank and a fuel filter holder I made since I couldn't find one anywhere.


July 31, 2006 - We got a fair bit done this month. The car is almost a roller, which is a bit frustrating since we are almost there, but there is always one more thing to do first. All I want to do is get pushed around our cul-de-sac making vroom, vroom noises.
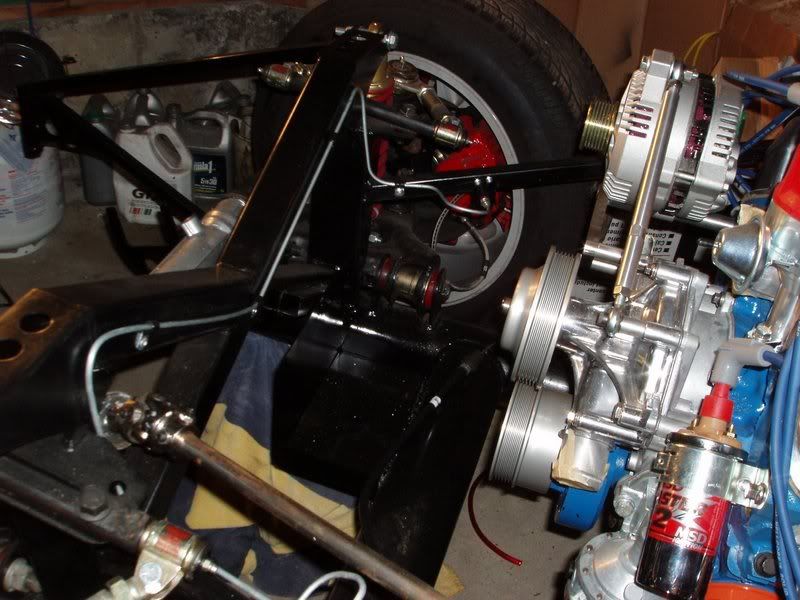
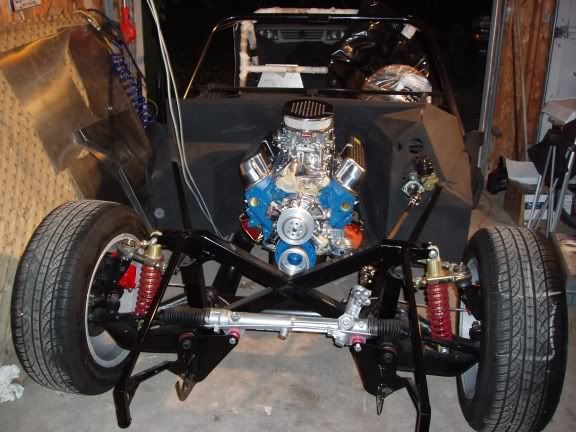
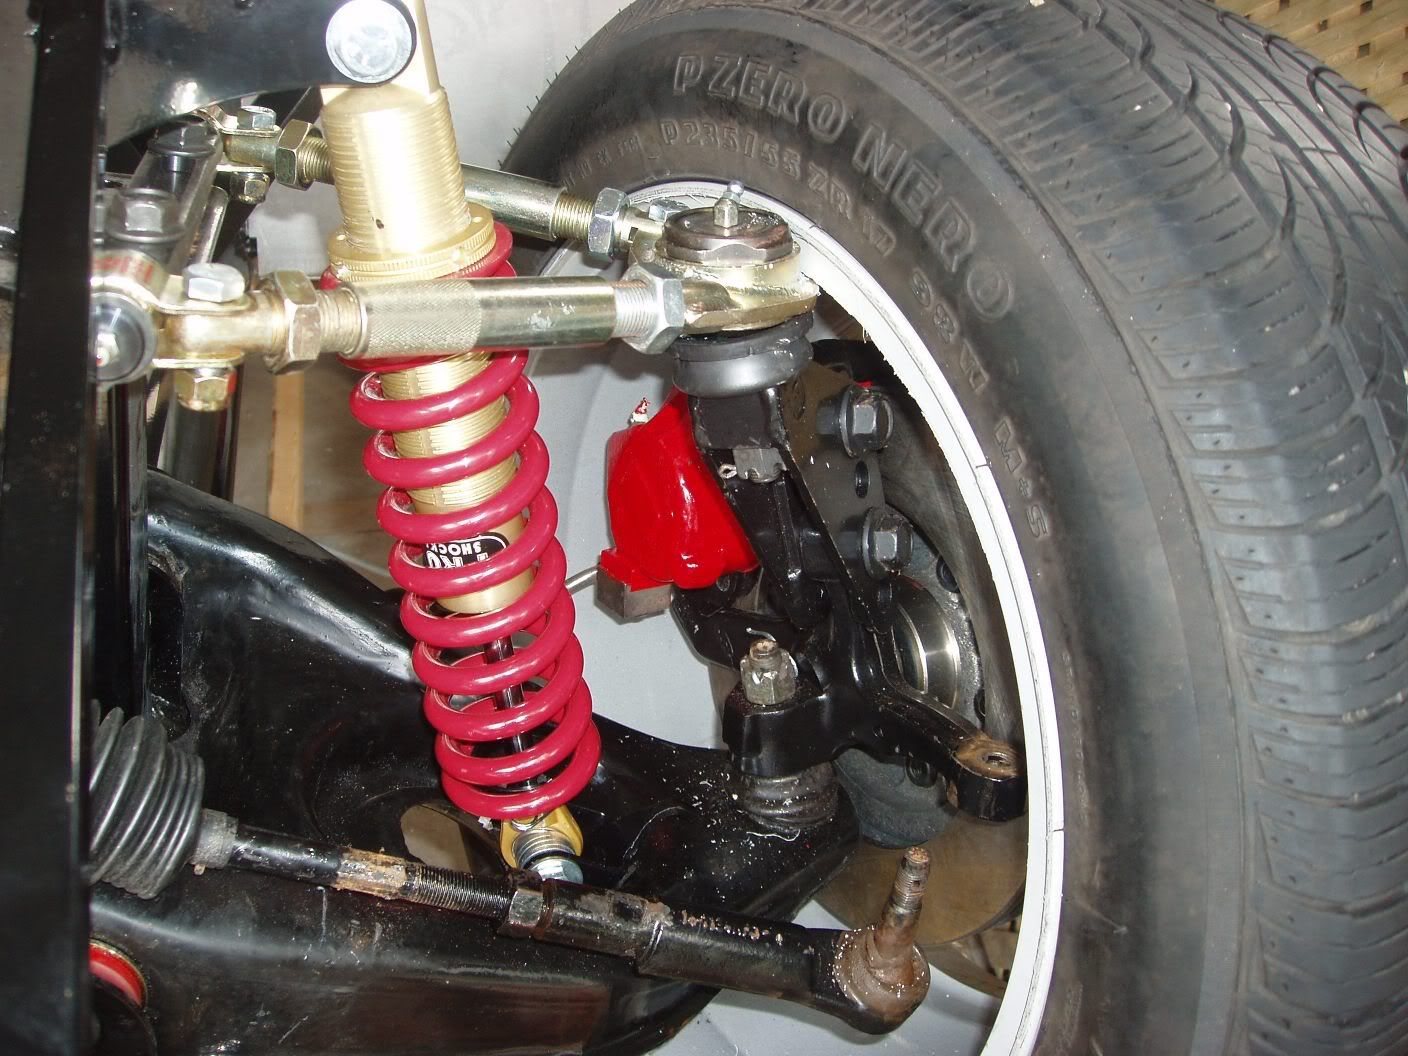
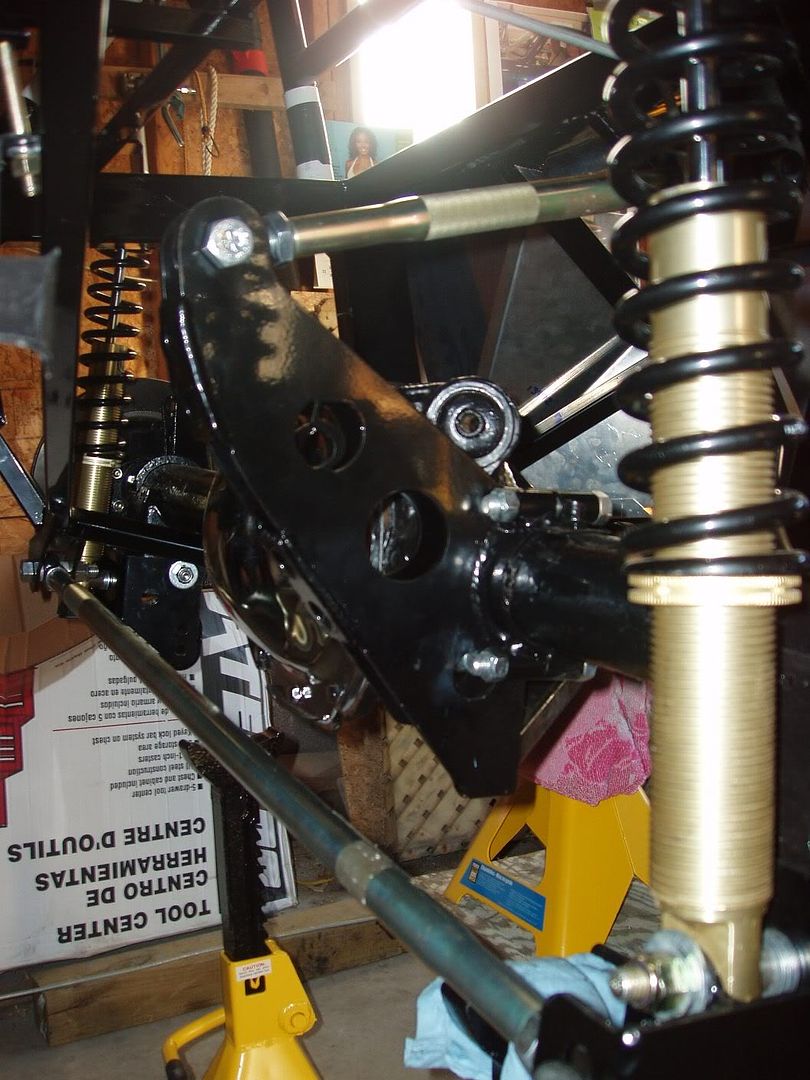
Peter completed the front suspension, but we need wheel spacers to run our Mustang bullits (ordered from ebay).

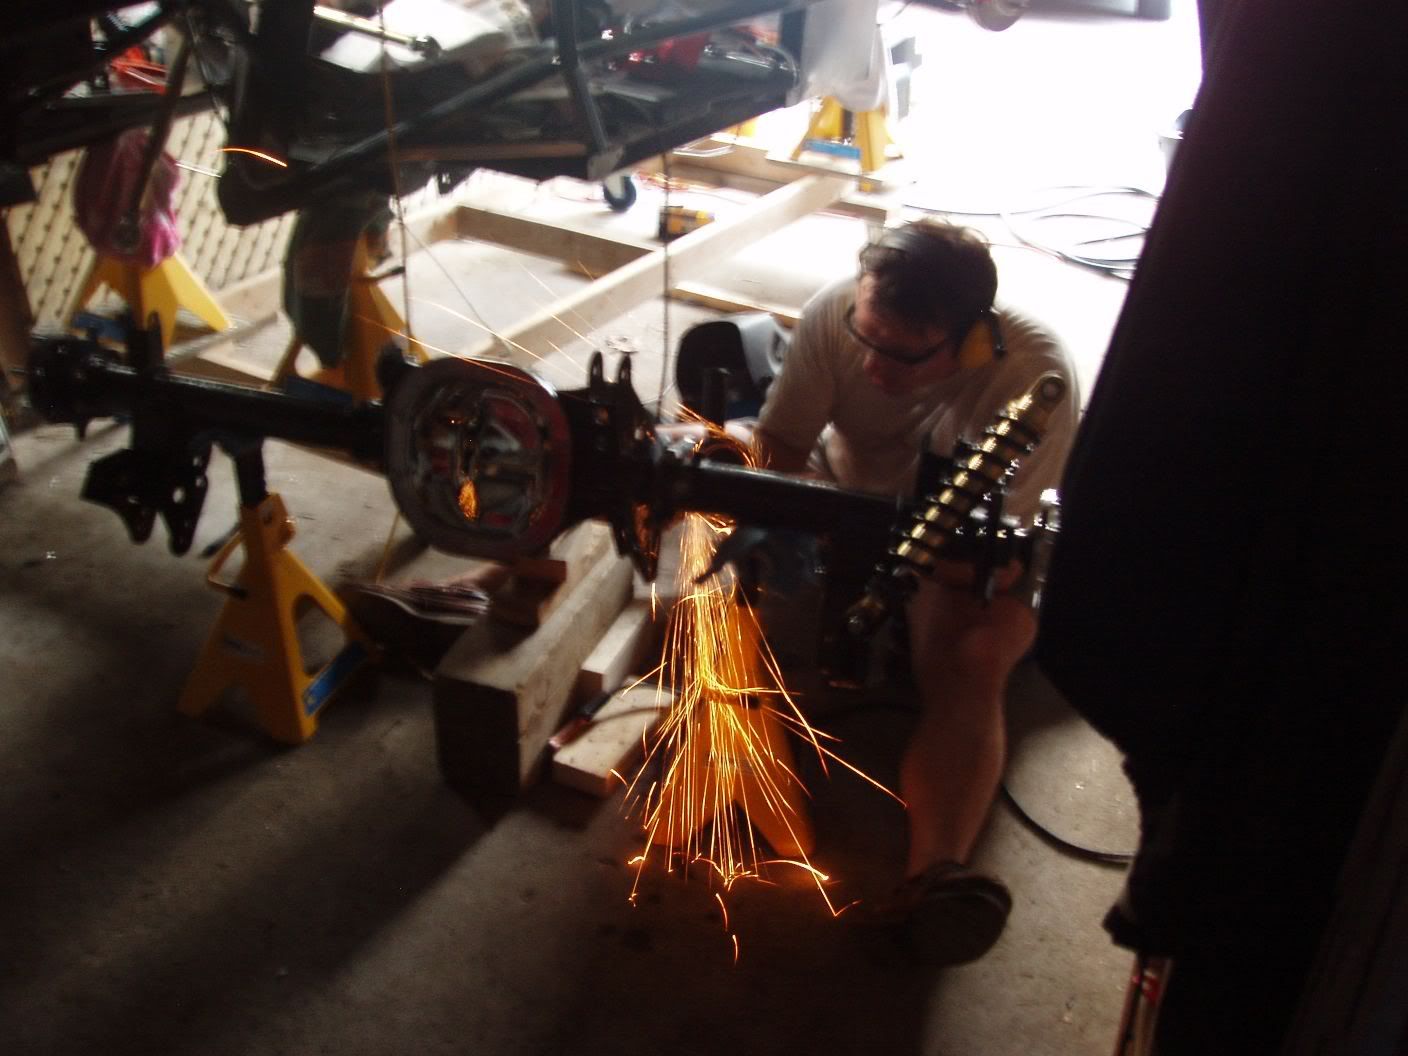
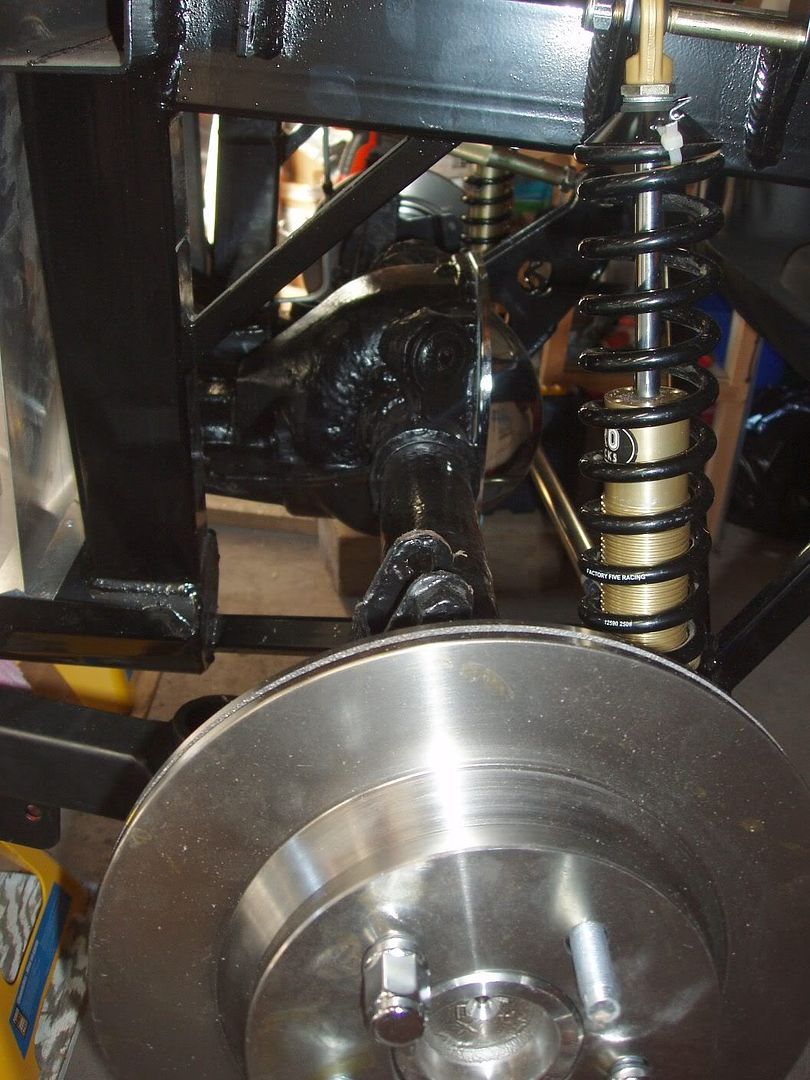
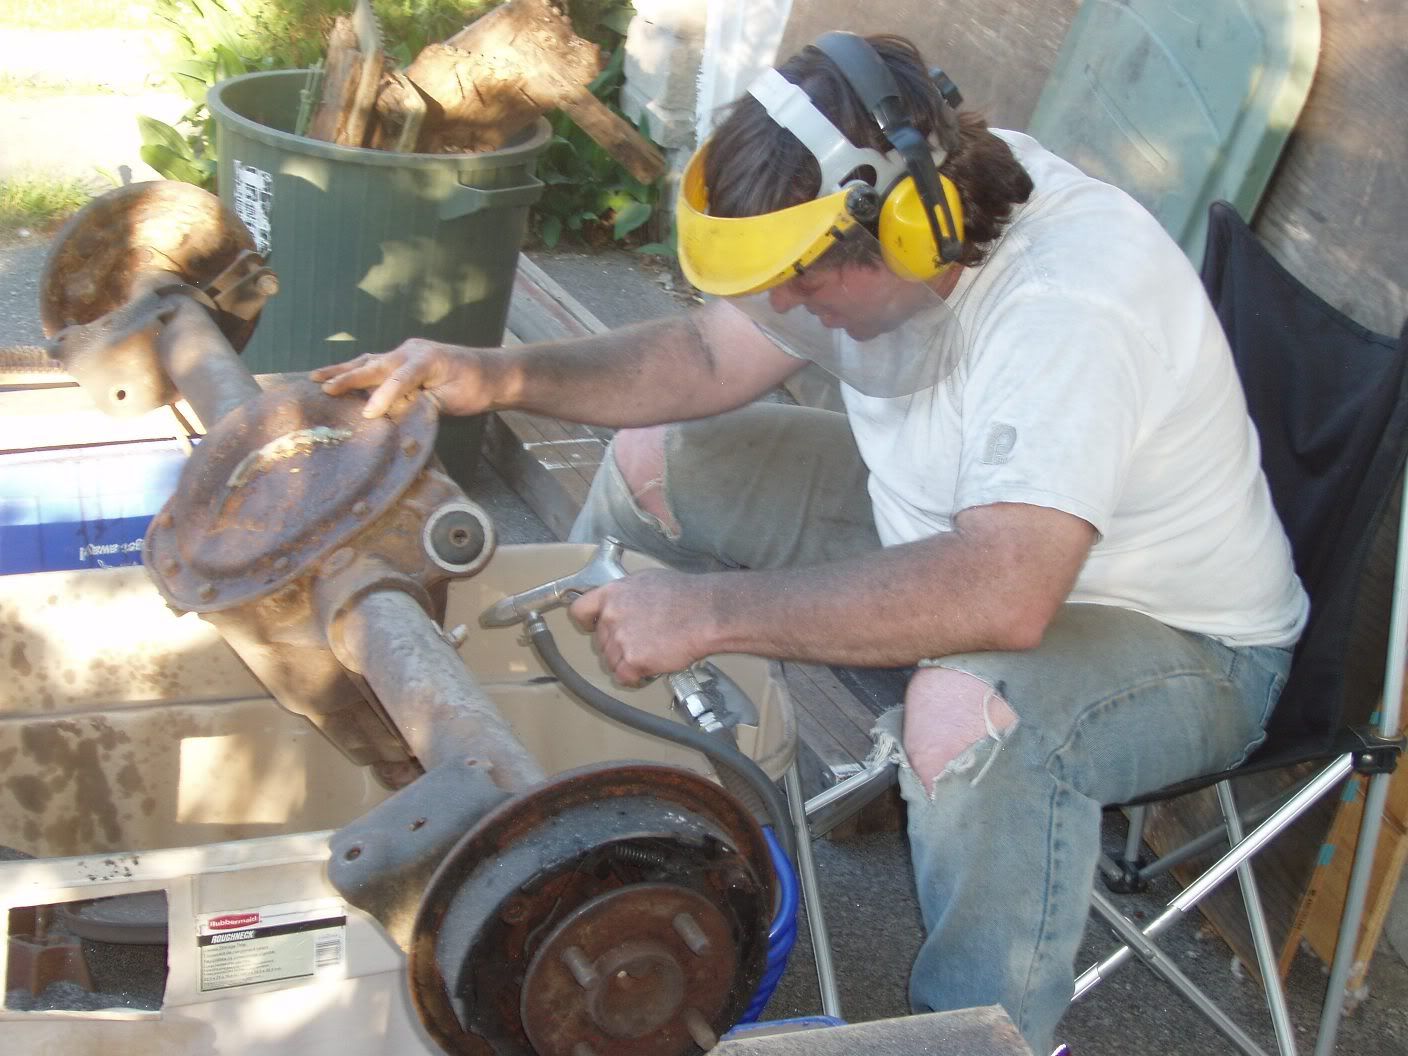
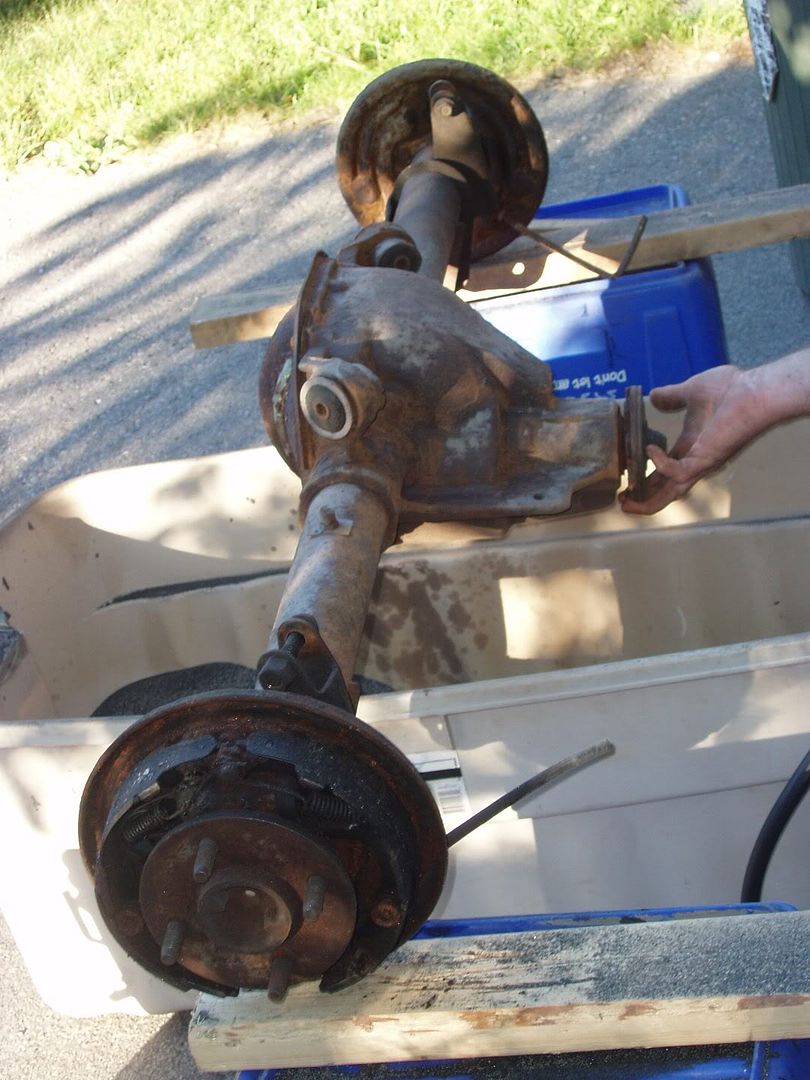
Mike worked on the rear-end, changing the axles to 5-lug and installing disc brakes. We purchased a conversion from Richard Oben. Changing the rear axles was a real pain since the pinion pin lock bolt broke and took a long time to drill out. Why do they call them "EZ-outs", because they aren't. Finally, everything was put back together, welded the banana bracket (first time welding anything!) and the 3-link has been mounted to the chassis.


Peter has also completed both footboxes, the cabin floors and test-fits of most other aluminum panels. We plan to totally cover the aluminum, either with soundproofing and/or carpet, etc.


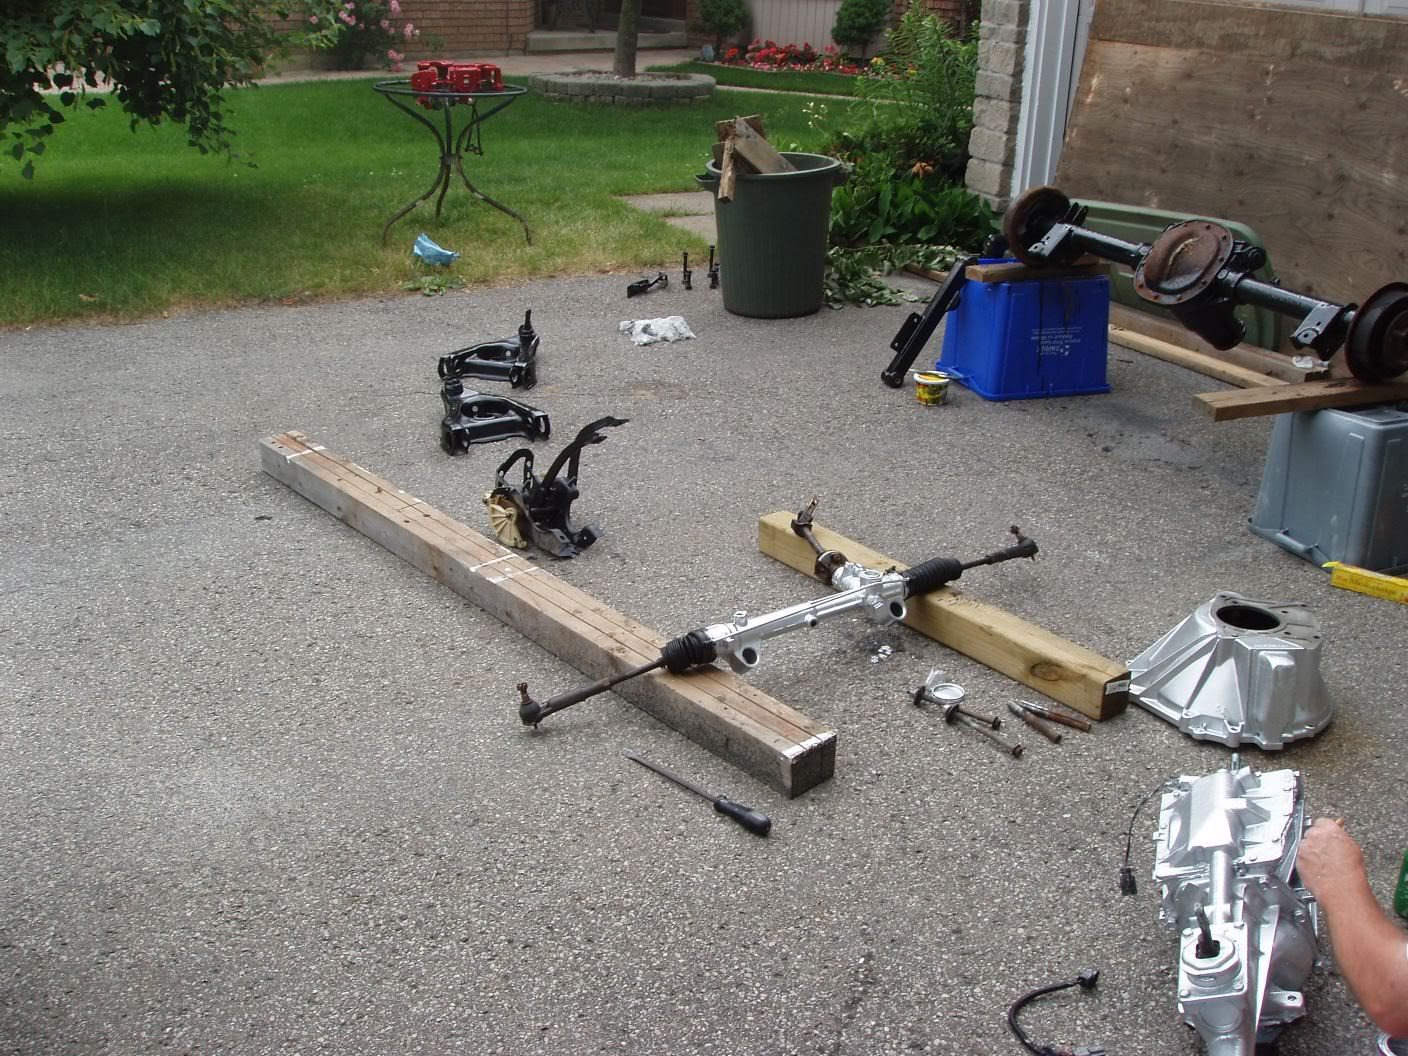
He also installed the steering rack, column and wheel, and the pedal box (after painting and prep). We also installed the gas tank after covering it with spray-on bed liner.

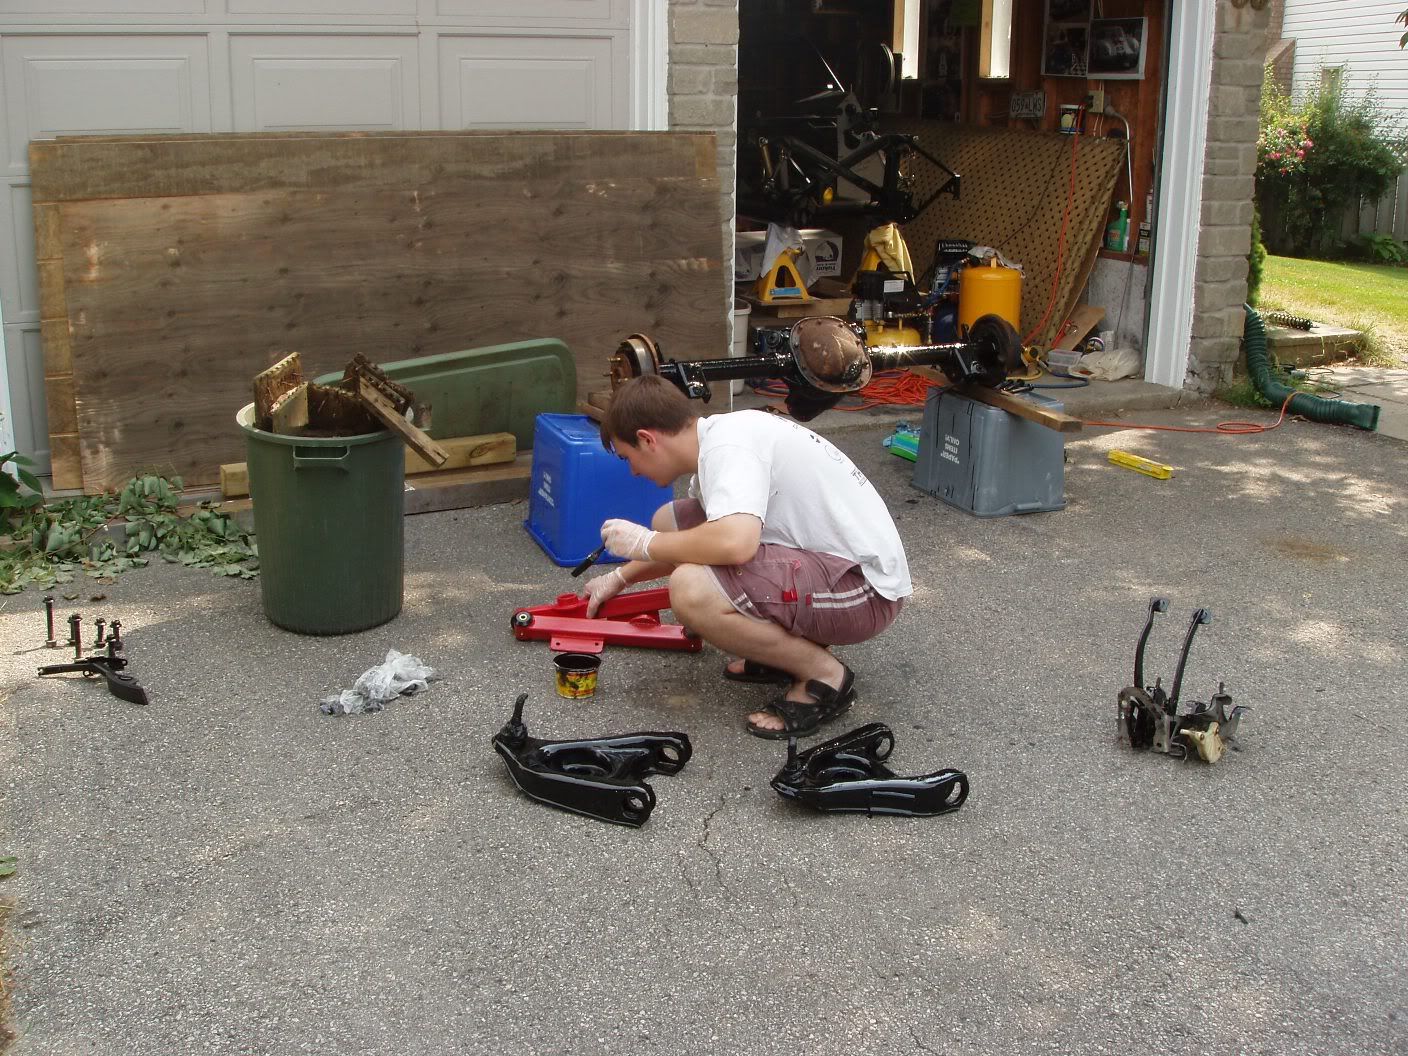
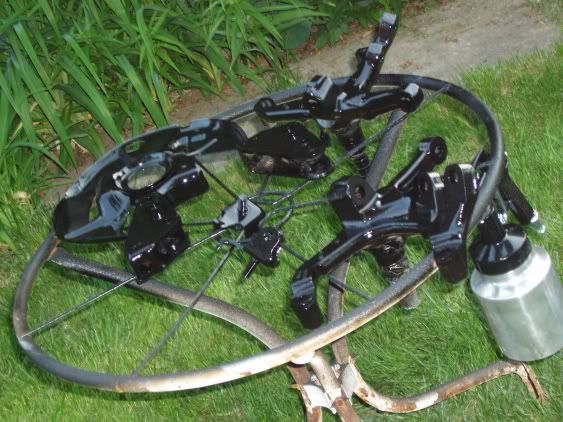
July 1, 2006 - Pete is now out of school so building will begin in earnest. July long weekend - painted lots of donor parts with POR15 (black) and aluminum Tremclad.
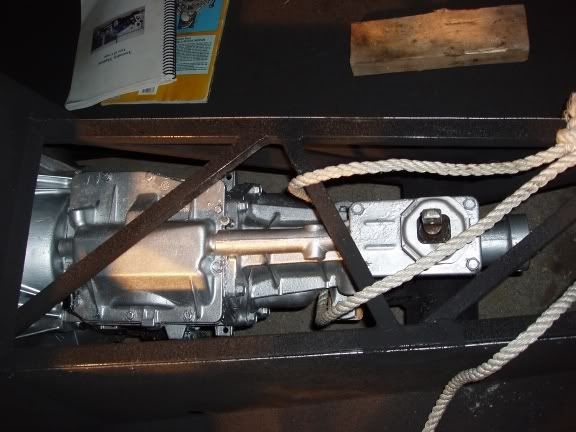
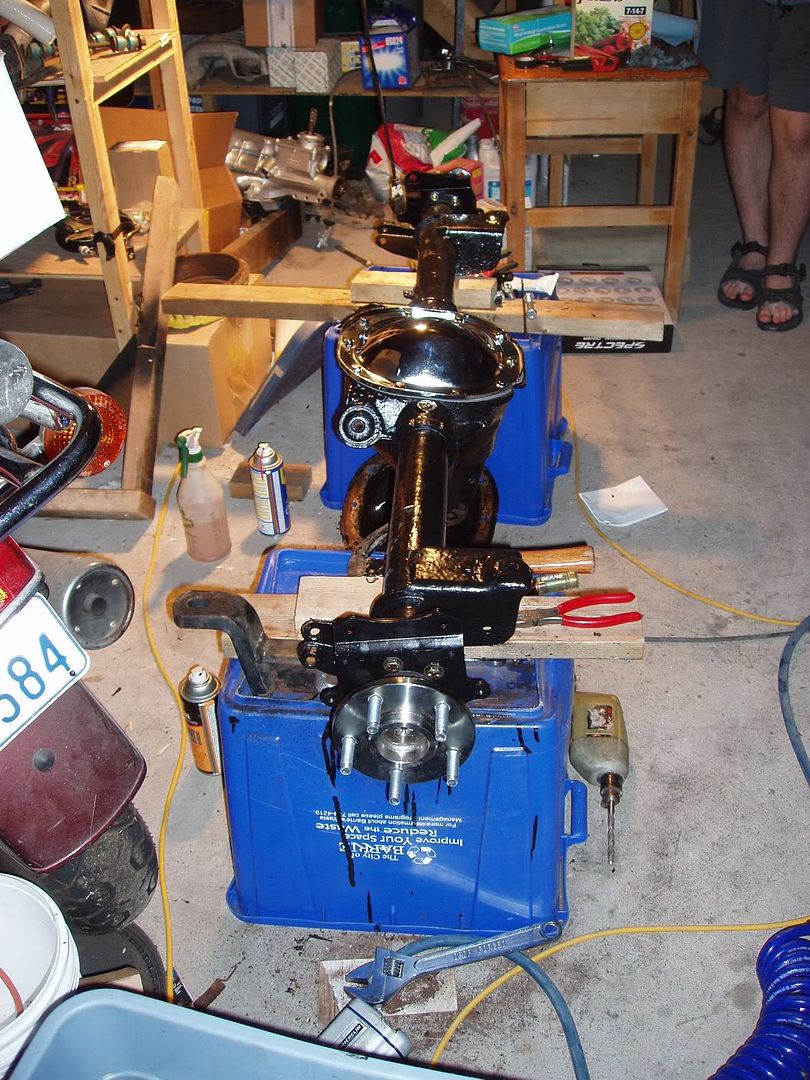
The rear-end was a substantial amount of work since it was pretty rusted. First, I sandblasted it, then painted it with POR15. Sandblasting was problably overkill and it rusted again within 48 hours. Painted the rear-end, another coat on front LCA's (after using a grinder to cut notches for coilovers), steering rack, transmission, mounting bolts, calipers and new rear trailing CA's. A garage removed the bushing shells from the rear CA, which is a big mistake since you need them and can't buy them. We had to purchase new CA's (garage paid for half).


Received lots of parts this month. Most of the backorders from FFR, coilovers, 5-lug disc conversion from Richard Oben. Photo of the calipers shows new calipers left and 3rd from left, donor calipers are right and second from left. all painted Ferrari red.

June 2006 - Have spent most of the time sandblasting donor parts, replacing contral arm bushings and painting. The rear-end is the last big part and is a chore. The steel rusts again after 24 hours so I'm going to try sandblasting and then painting in sections.
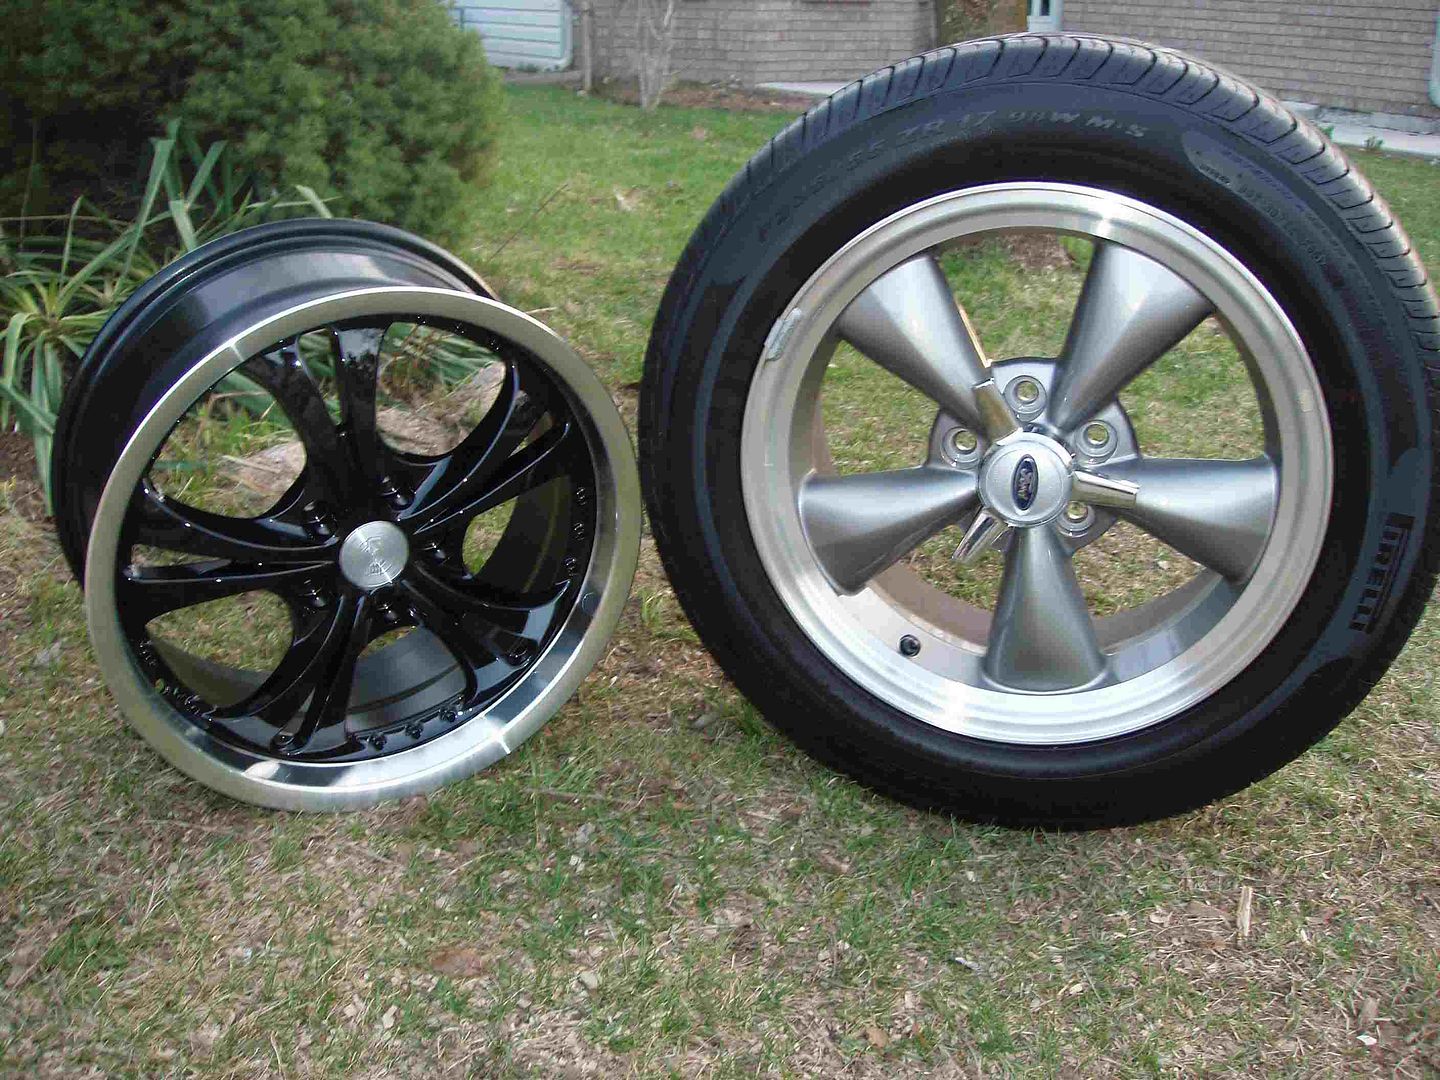
Sourced 17x8 wheels and rims. Got a great deal on two sets and couldn't decide so I bought both and will sell the second set. However, feedback from others says the size is wrong and will not look right so maybe we'll sell both and start over. We prefer the bullits and will likely stay with those.

May 2006 - Tried spray painting for first time. I bought a HVLP sprayer over ebay for $5. It came with three nozzles and works great. Used black tremclad mixed with a bit of thinner. These are the spindles, lower shock mounting brackets and one brake dust shield.

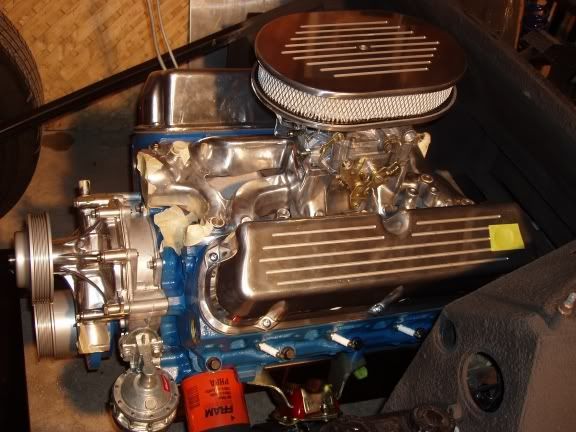
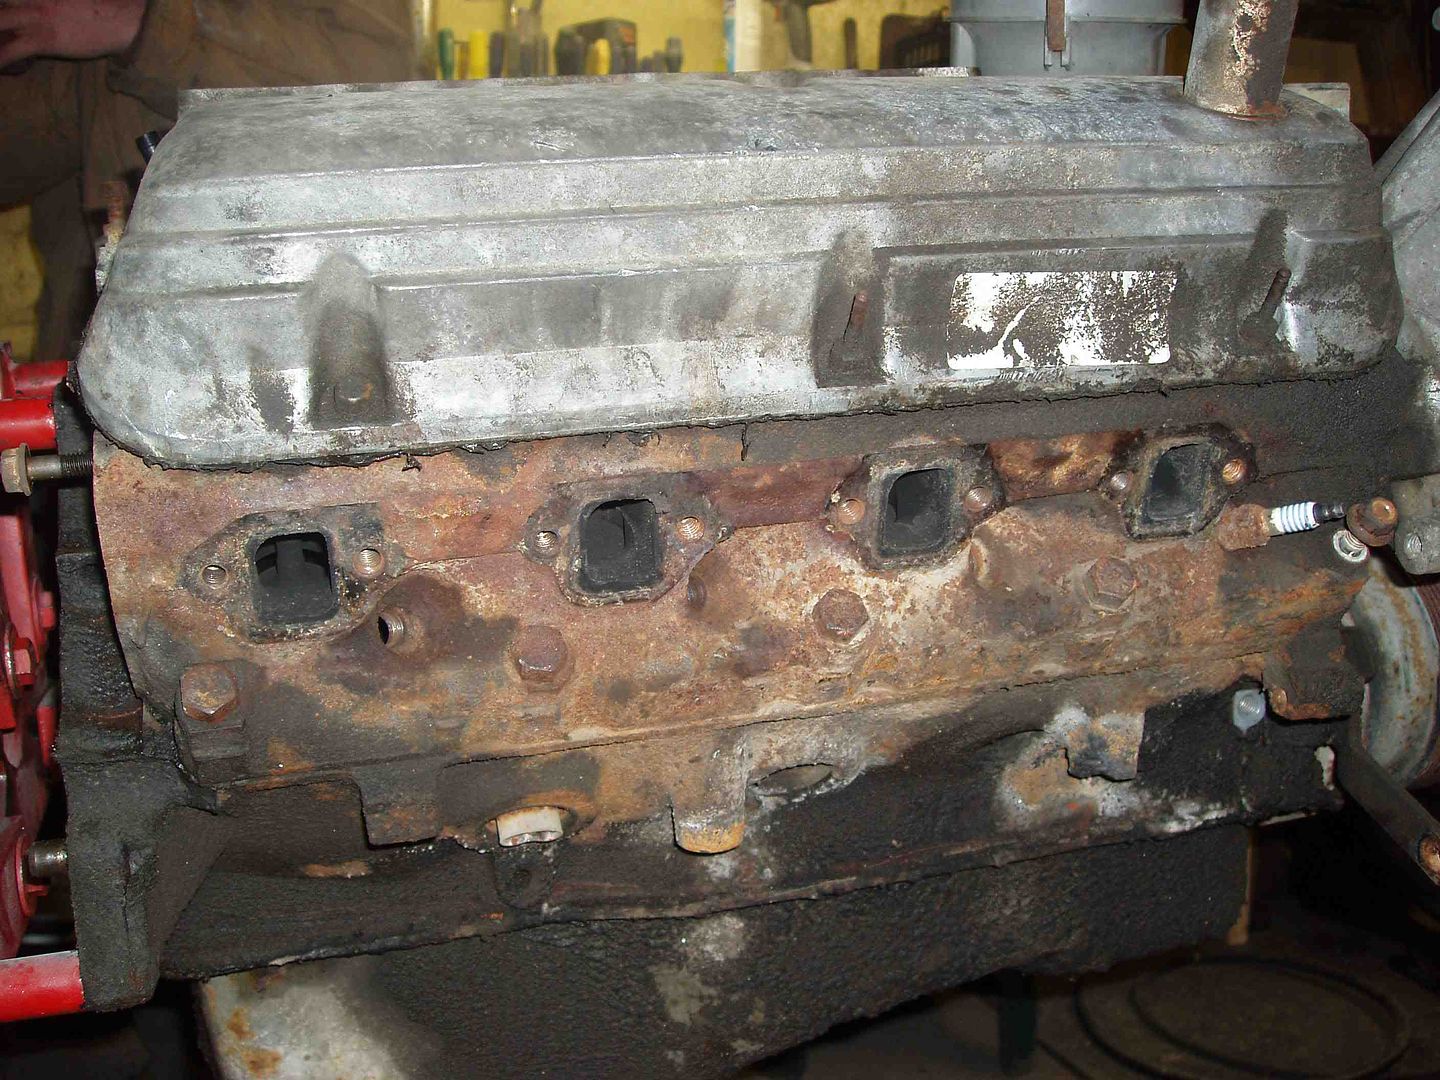
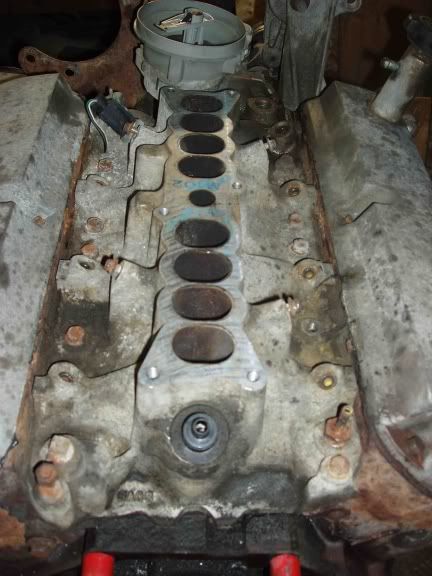
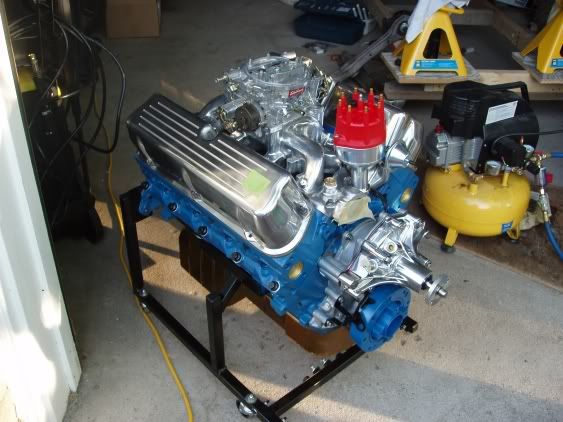
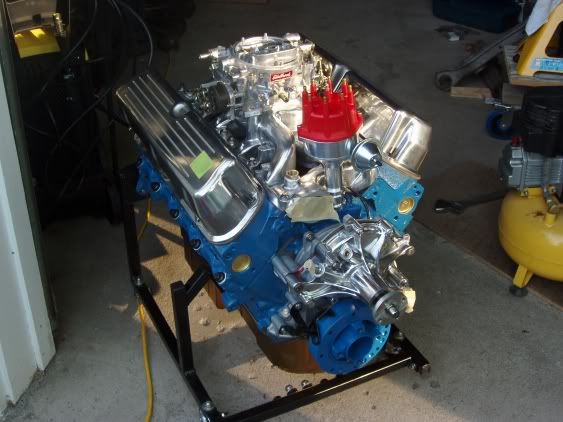
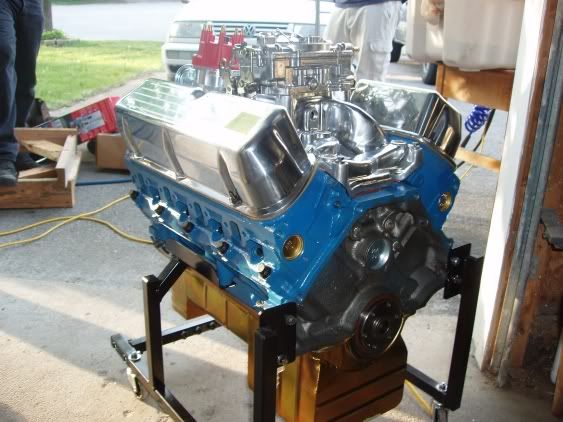
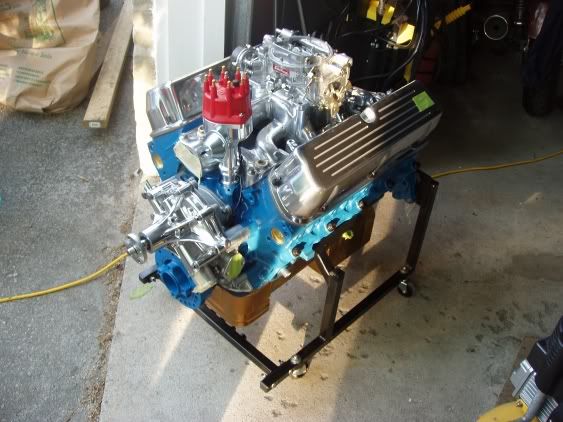
Engine work was completed by Shawn Campsall (Campsall Engines, Thorton). Shawn was great to work with and did a really good job for us. Engine work started with the 1987 donor block and crakshaft, and everything else was new. Work included bored 30 over, GT heads, ZC FMS cam, Typhoon intake, new lifters, rocker arms, valves, etc. bearings, MSD distributor, Edelbrock 4206 carb, Weiand mech water pump, edelbrock mech fuel pump, intake covers. The block was cleaned, beaded, painted inside and out, milled flat under stress, then reassembled.


April 2006 - Our first finished part – upper rear control arms (sandblasted, new poly bushings and painted with black Tremclad)(too bad you don't use them for a 3-link!)
Removing bushings. Many of the bushings were not in good shape so replaced all with a poly bushing kit from Summit. Made a bushing press using a series of washers, short pipe section and nuts.
We built a box for sandblasting donor parts and used a portable siphon sandblaster. Worked well. Could have used a bigger air compressor (only 2hp).


Our donor was originally a 1987 Mustang LX in very rough shape. Was driven hard and abused. We used the engine block, crankshaft, suspension control arms and rearend only. The donor was stolen (why would anyone want a beat up ’87 with no engine, tranny or rearend?) so the remaining donor parts were purchased from Al Beix (www.westerncanadacobras.com). If we ever do it again, we’ll by a West Coast pallet donor since they don’t use road salt and everything was in good shape.

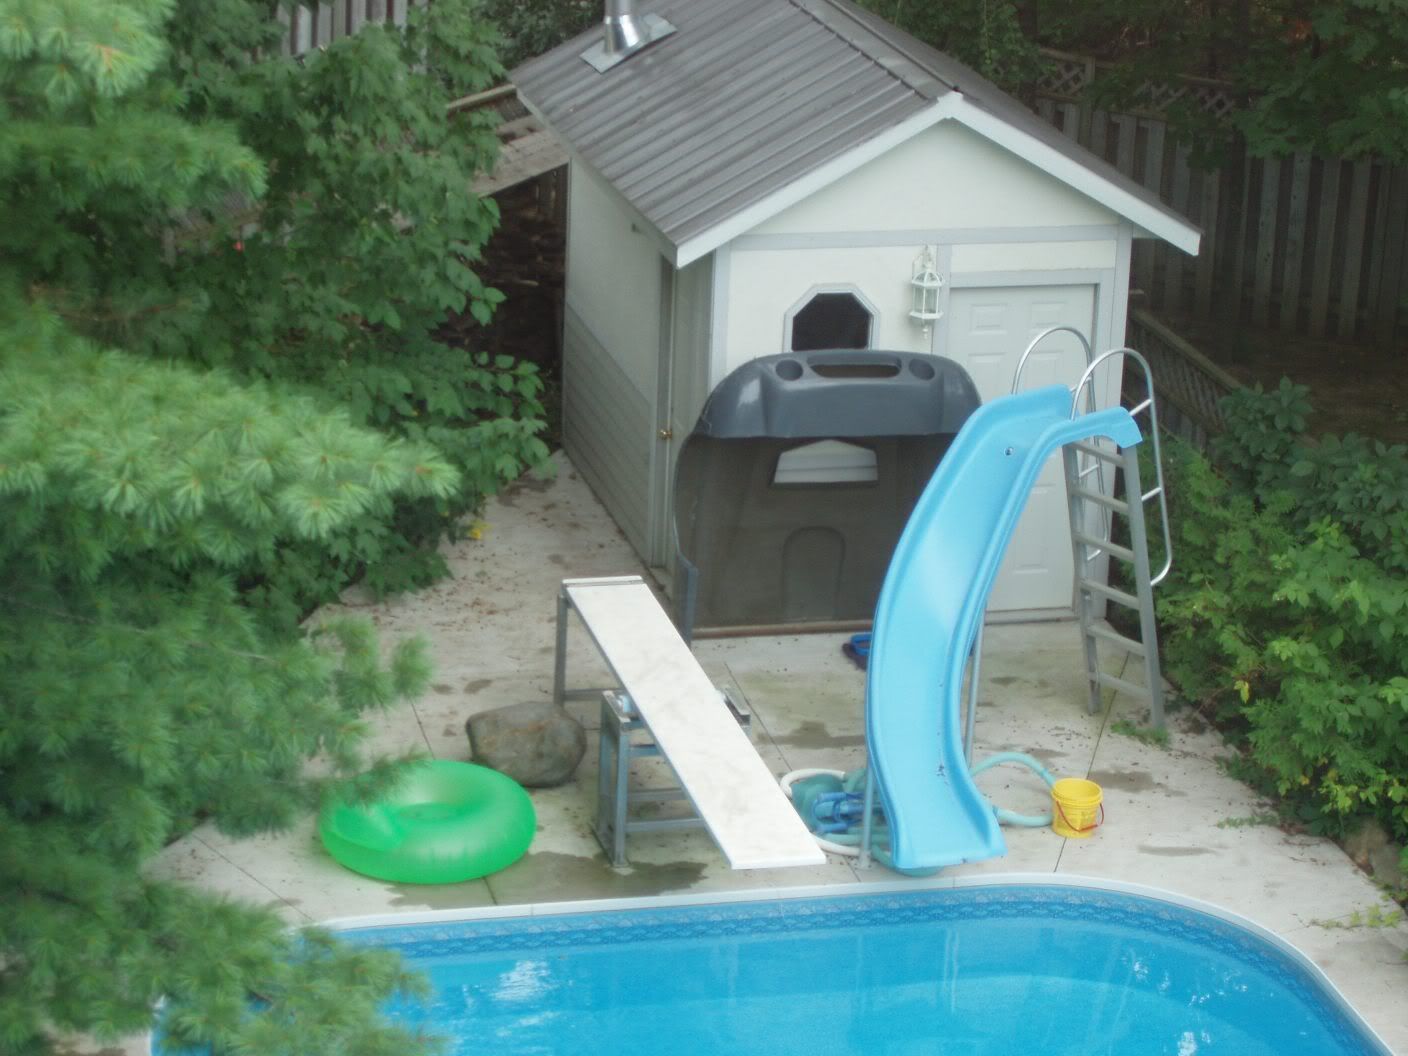
Mar 11, 2006 - Arrived home about 8pm. Loaded everything into the garage. Later, stored the front clip in our pool shack, put the body up on top of our shelving and put the chassis on a rolling set of jack stands.

Mar 11, 2006 - Loaded everything by about 11am and started the long drive home. The trip was completed without mishap, although the rear differential in my truck fell apart the week after we got home. The border crossing was uneventful since we had all the right paperwork.

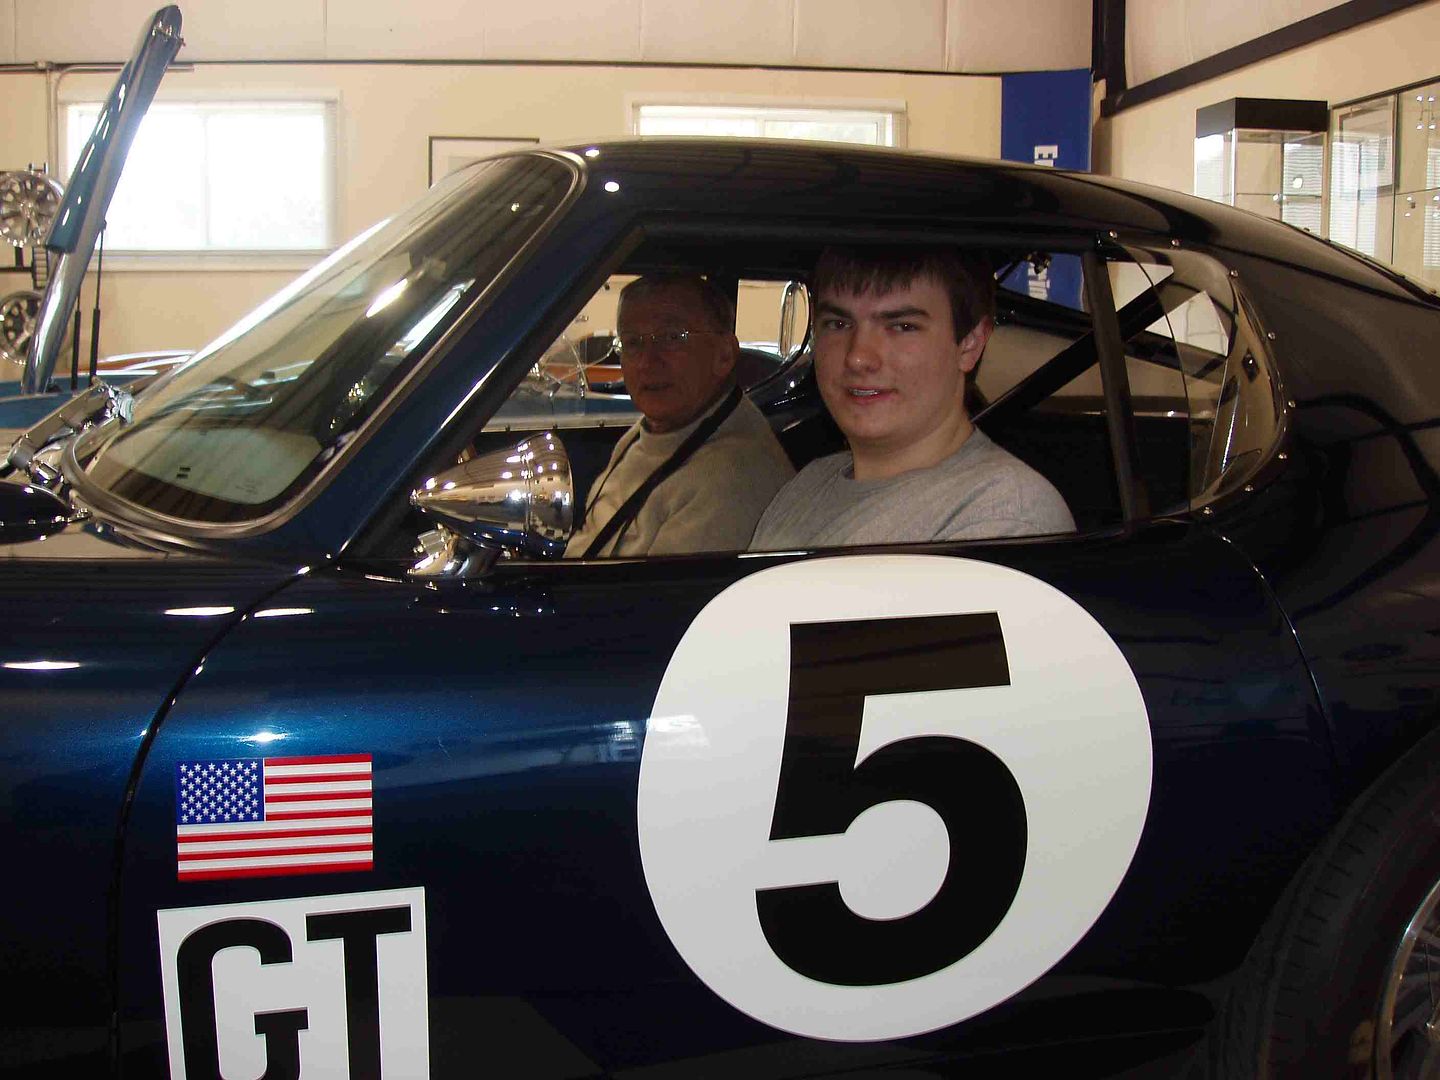
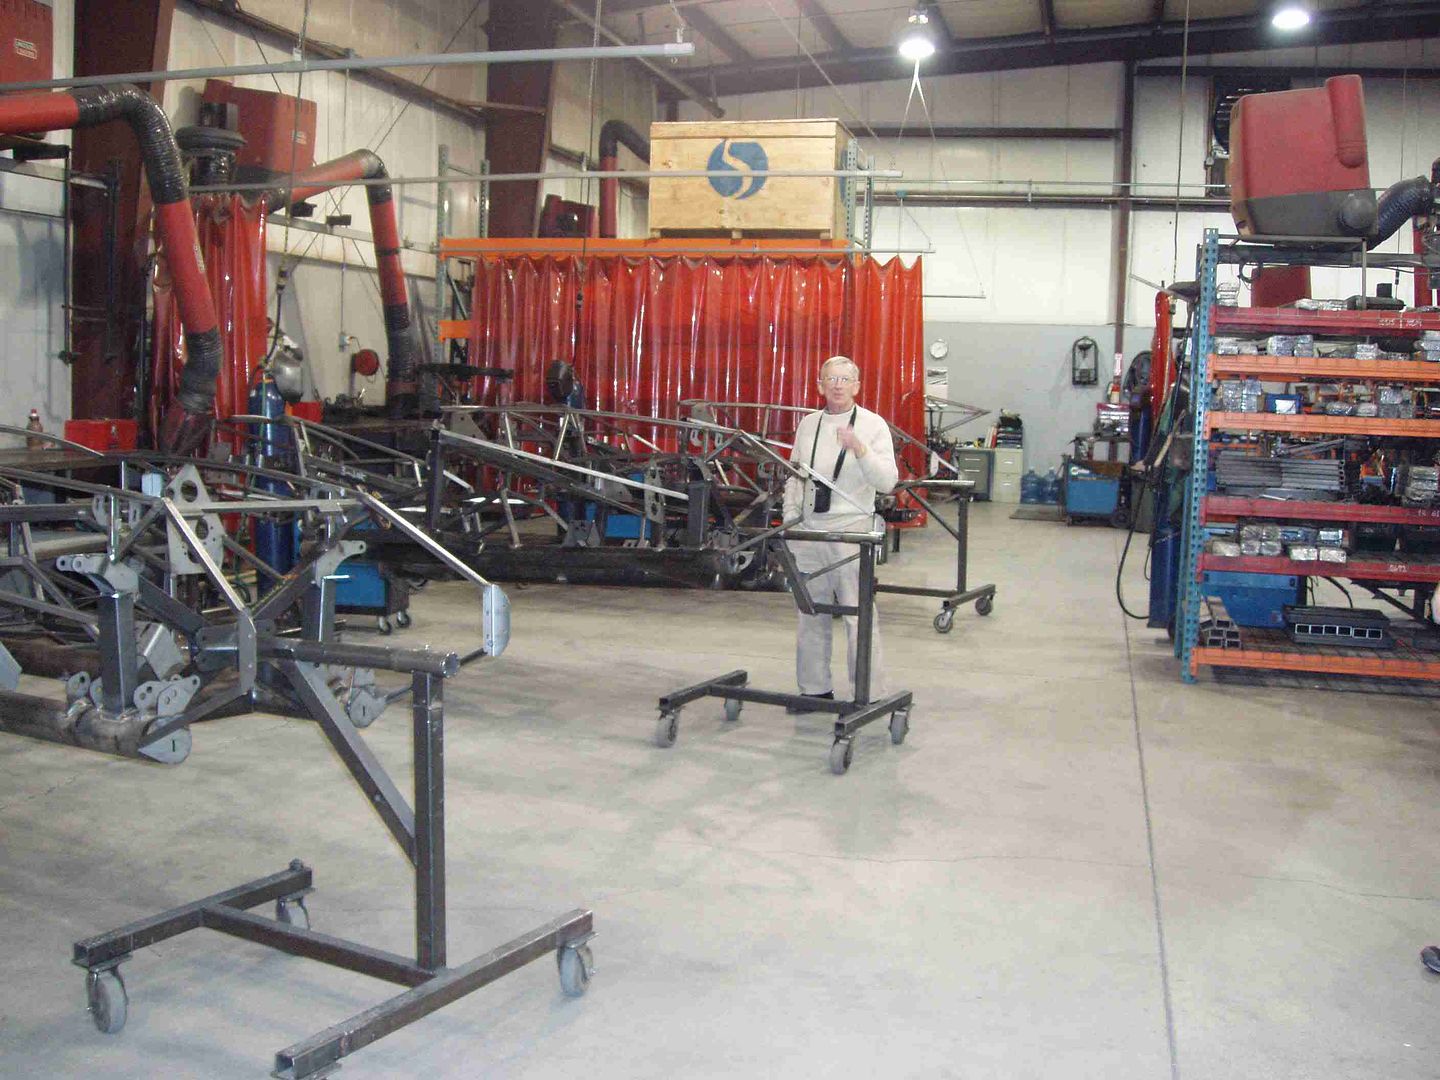
Had a tour of the facility and admired the new GTM. Maybe next year’s project.
Visiting the Factory Five warehouse was a treat. We picked up the car on Saturday Mar 11, 2006, one of eight kits being picked up that day. The trip was completed by Dennis (grandfather)(thanks for sharing the driving), Mike (father) and Peter (son). Peter turns 16 in 2006 and the car is really his project / summer job. Our original goal was to complete the vehicle by Sept 1, 2006 however unrealistic that might sound now. Visiting the factory was a worthwhile trip – a long drive (about 2200km total) over three days, but it was a good way to start – and good seafood in Wareham.

Thanks to a whole bunch of people that have helped along the way - my wife for putting up with my distraction throughout this event, my kids who have helped turn wrenches and partake in this adventure, Mike Holmes, Shawn Campsall, FFR, and the family at FFcobra who helped me spend $$ and answered all my questions.